For most use-cases, the best option in Node.js is Playwright, Microsoft's browser automation framework, which drives a real browser directly.
To take a screenshot in Node.js with Playwright, install the package and the Chromium build it drives:
npm install playwright
npx playwright install chromium
Then take a screenshot:
import { chromium } from "playwright";

const browser = await chromium.launch({ headless: true });
const page = await browser.newPage({ viewport: { width: 1920, height: 1080 } });

await page.goto("https://screenshotscout.com/");
await page.screenshot({ path: "playwright-screenshot.png" });

await browser.close();
That's a 1920x1080px viewport screenshot, saved to your local disk as playwright-screenshot.png.
Playwright is my default suggestion for most screenshot tasks, but depending on what you're building, one of the other three tools might fit you better:
| Tool | Performance | Reliability | Setup / DX | Cost | Best for |
|---|---|---|---|---|---|
| Playwright | ★★★★★ | ★★★☆☆ | ★★★★☆ | Free | Most DIY website screenshots in Node.js |
| Puppeteer | ★★★☆☆ | ★★★☆☆ | ★★★★☆ | Free | Existing Puppeteer code and the puppeteer-extra plugins |
| Selenium | ★★★☆☆ | ★★☆☆☆ | ★★★☆☆ | Free | Existing Selenium/WebDriver stacks |
| Screenshot Scout (screenshot API) | Offloaded to the API provider's infrastructure | ★★★★☆ | ★★★★★ | Free / $ per use | Production, scale, reliability |
One note on that table. Performance and Reliability are scored straight off the benchmarks below. Setup / DX is my subjective opinion, formed while writing the code for this article, and so is the "Best for" call, which weighs all four of the other columns together.
The two ways to take webpage screenshots in Node.js
We tested 4 tools here, and there are plenty more, but the first decision isn't which tool. It's which of these two approaches you take:
- Run a headless browser yourself, or
- Pay someone else to run one: a screenshot API.
The first one is resource-heavy. Our benchmarks below put a single screenshot at hundreds of megabytes of RAM, and over 1GB for two of the three libraries. The CPU cost is similar: the heaviest tool kept 72% of a 2-vCPU box busy for a second and a half per capture, and the other two weren't far behind.
The DIY route has a second cost, too. None of these tools does more than take a plain screenshot, so the moment you want the annoyances gone, a CAPTCHA avoided, or a full page captured properly, you're adding a third-party package and taking on the job of keeping it current.
Node.js is a good place for that. Every one of these libraries has a working off-the-shelf package for ads, for cookie banners, and for bot protection, which isn't true everywhere: in our Java screenshot benchmarks the stealth package passed a fingerprint test and then did nothing against real sites, leaving all three libraries on 11.1%. Here, Playwright and Puppeteer reached the page 84.2% and 78.9% of the time. The Node.js packages are mature, and it shows in the numbers below.
Doing it yourself is free, of course. Free until you need scale, anyway, because past that you're renting a separate VPS or cloud instance to do the rendering.
Go with a screenshot API instead and the rendering moves onto someone else's machines, which keeps your own resource use small. The annoyances (cookie banners, ads, chat widgets), CAPTCHAs, and full-page capture are dealt with for you too.
What it costs you is money. Most screenshot APIs are free up to a monthly allowance, often in the low hundreds of screenshots, though the exact number varies from provider to provider. After that, you pay.
Playwright
Playwright is Microsoft's browser automation framework, and it's my default choice for taking screenshots in Node.js.
It won every performance metric of the libraries we tested: the fastest at 1.4s per screenshot, the lightest on RAM at 656MB, and the lowest on CPU at 1.78 CPU-seconds. It was also the best library on bot protection, at 84.2% with an off-the-shelf stealth plugin. The code is the tidiest of the three, and it's actively maintained.
The problem is full-page capture, where it scored 0%. Playwright renders the whole page in one pass without ever scrolling through it, so every lazy-loaded image stays unloaded and never makes it into the screenshot. Note though that Puppeteer and Selenium scored 0% too, and for the same reason, so this isn't a Playwright problem specifically. More on that further down.
Setup
If you skipped the quick example above, install Playwright and its Chromium build before running the examples in this section:
npm install playwright
npx playwright install chromium
Every example in this article uses ESM with top-level await, so set "type": "module" in your package.json first. They're written as TypeScript, but nothing in them is TypeScript-only, so they run as plain JavaScript too.
Viewport screenshot
Here's how you capture a viewport screenshot in Node.js with Playwright:
import { chromium } from "playwright";

const browser = await chromium.launch({ headless: true });
const page = await browser.newPage({ viewport: { width: 1920, height: 1080 } });

await page.goto("https://screenshotscout.com/");
await page.screenshot({ path: "playwright-screenshot.png" });

await browser.close();
In the code snippet above, viewport: { width: 1920, height: 1080 } sets the viewport to 1920x1080px and path is where the PNG is saved. Note that goto() waits for the page's load event by default, which is the readiness signal to keep in mind once we get to the benchmarks. And don't drop the browser.close() at the end. Without it the Chromium process keeps running after your script exits, and if you're capturing in a loop you'll run the machine out of memory.
Full-page screenshot
Here's how you capture a full-page screenshot in Node.js with Playwright:
import { chromium } from "playwright";

const browser = await chromium.launch({ headless: true });
const page = await browser.newPage({ viewport: { width: 1920, height: 1080 } });

await page.goto("https://screenshotscout.com/");
await page.screenshot({ path: "playwright-full-page-screenshot.png", fullPage: true });

await browser.close();
The only difference from a viewport screenshot is fullPage: true. It's worth understanding the limitation here, though.
Playwright renders the whole page in a single pass and never scrolls through it. On most modern pages that's a problem, because the images below the fold are lazy-loaded: nothing requests them until they're scrolled into view. Since Playwright never scrolls, they never load, and they're missing from the screenshot.
That's where the 0% (0/20) in our full-page benchmark comes from. There are two ways around it:
- Scroll-and-stitch: scroll the page one viewport at a time, capture at each step, then stitch the captures into a single image. This is what most screenshot APIs do under the hood.
- Measure-and-resize: read the page's real height, resize the viewport to match it so the content below the fold comes into view and loads, wait, then capture.
I benchmarked measure-and-resize in our Java and C# articles, where it scored 78.9% and 84.2%, and both of those have the code for it. Note though that this wasn't tested in Node.js, so treat it as a pointer rather than a benchmarked result.
Screenshot a specific element
Here's how you take a screenshot of an element on the page in Node.js with Playwright, and not the entire viewport:
import { chromium } from "playwright";

const browser = await chromium.launch({ headless: true });
const page = await browser.newPage({ viewport: { width: 1920, height: 1080 } });

await page.goto("https://screenshotscout.com/");
await page.locator("#pricing").screenshot({ path: "playwright-element-screenshot.png" });

await browser.close();
First you specify the CSS selector of the element you want, then you take the screenshot on the Locator for it instead of on the page. Playwright waits for the element on its own, so there's no explicit wait to write.
Puppeteer
Puppeteer is Google's browser automation library, and the one most Node.js developers try first. It talks to Chrome over the DevTools Protocol and downloads a matching Chrome for Testing build when you install it, so there's no browser for you to set up.
Its main advantage is puppeteer-extra, a set of plugins built on top of Puppeteer. The one that matters most for screenshots is the stealth plugin, the most widely used off-the-shelf answer to bot protection anywhere, and it took Puppeteer to 78.9% on that benchmark (we ran it through Zorilla, a maintained fork).
The downsides are all about resource use. Puppeteer used the most CPU time of the four tools at 2.24 CPU-seconds per screenshot, it was slower than both Playwright and Selenium at 1.6s, and it peaked at 1063MB of RAM. Its full-page capture scored 0%, for the same reason Playwright's did.
Setup
Install Puppeteer:
npm install puppeteerPuppeteer downloads and manages its own Chrome for Testing binary during installation, so there's no separate browser step.
Viewport screenshot
Here's how you take a viewport screenshot in Node.js using Puppeteer:
import puppeteer from "puppeteer";

const browser = await puppeteer.launch({ headless: true });
const page = await browser.newPage();

await page.setViewport({ width: 1920, height: 1080 });
await page.goto("https://screenshotscout.com/");
await page.screenshot({ path: "puppeteer-screenshot.png" });

await browser.close();
The viewport is set on the page rather than passed in when the page is created, which is the one real difference from Playwright. The result is the same 1920x1080px screenshot.
Full-page screenshot
Here's how you take a full-page screenshot in Node.js using Puppeteer:
import puppeteer from "puppeteer";

const browser = await puppeteer.launch({ headless: true });
const page = await browser.newPage();

await page.setViewport({ width: 1920, height: 1080 });
await page.goto("https://screenshotscout.com/");
await page.screenshot({ path: "puppeteer-full-page-screenshot.png", fullPage: true });

await browser.close();
Puppeteer has the same limitation Playwright does. It doesn't scroll before capturing, so the images below the fold are never requested and they're missing from the screenshot, which is the 0% in our benchmark. The same two fixes from the Playwright section apply: scroll-and-stitch, or measure-and-resize.
Screenshot a specific element
Here's how you take a screenshot of an element in Node.js using Puppeteer:
import puppeteer from "puppeteer";

const browser = await puppeteer.launch({ headless: true });
const page = await browser.newPage();

await page.setViewport({ width: 1920, height: 1080 });
await page.goto("https://screenshotscout.com/");

const element = await page.locator("#pricing").waitHandle();
await element.screenshot({ path: "puppeteer-element-screenshot.png" });

await browser.close();
You wait for the element matching your CSS selector with waitHandle(), then take the screenshot on the handle it returns.
Selenium
Selenium is the long-standing browser automation project, and its selenium-webdriver package is the Node.js binding. Since Selenium 4.6 it comes with Selenium Manager, which downloads and manages the matching browser and driver for you, so setup is a single npm install.
Its advantage in Node.js is a native full-page screenshot, through WebDriver BiDi. Selenium on Chrome has no such option in Java or C#, where you need a workaround instead. It was also quicker than Puppeteer, at 1.5s per screenshot.
The downsides start with resource use. It peaked at 1193MB of RAM, the heaviest of the four, and occupied 72% of the box during a capture. That native full-page screenshot still scored 0%, because BiDi renders the whole document without scrolling through it first. And bot protection is the worst of it: 11.1%, against 84.2% for Playwright and 78.9% for Puppeteer, the one library where the off-the-shelf stealth route didn't work. I explain why in the bot protection section, because the cause is visible in a screenshot.
Setup
Install the Selenium WebDriver package:
npm install selenium-webdriverSelenium Manager provisions Chrome and ChromeDriver for you, so there's nothing else to install.
Viewport screenshot
Here's how you take a viewport screenshot in Node.js using Selenium:
import { Browser, Builder } from "selenium-webdriver";
import chrome from "selenium-webdriver/chrome.js";
import { writeFile } from "node:fs/promises";

const options = new chrome.Options();
options.addArguments("--headless=new", "--window-size=1920,1080");
const driver = await new Builder()
  .forBrowser(Browser.CHROME)
  .setChromeOptions(options)
  .build();

await driver.get("https://screenshotscout.com/");
await writeFile("selenium-screenshot.png", await driver.takeScreenshot(), "base64");

await driver.quit();
Two things to note. First, takeScreenshot() returns a base64 string rather than bytes, which is why the write passes "base64" as the encoding. Second, Selenium takes a window size, not a viewport size, so --window-size=1920,1080 doesn't produce a 1920x1080 image. The window size includes the browser's own UI, so the actual capture is smaller: the example above produced a 1904x929px screenshot. And as with Playwright, don't skip driver.quit(), or the Chrome process stays alive after your script finishes.
Full-page screenshot
Here's how you take a full-page screenshot in Node.js using Selenium:
import { Browser, Builder } from "selenium-webdriver";
import getBrowsingContextInstance from "selenium-webdriver/bidi/browsingContext.js";
import {
  CaptureScreenshotParameters,
  Origin,
} from "selenium-webdriver/bidi/captureScreenshotParameters.js";
import chrome from "selenium-webdriver/chrome.js";
import { writeFile } from "node:fs/promises";

const options = new chrome.Options();
options.addArguments("--headless=new", "--window-size=1920,1080");
options.enableBidi();
const driver = await new Builder()
  .forBrowser(Browser.CHROME)
  .setChromeOptions(options)
  .build();

await driver.get("https://screenshotscout.com/");

const context = await getBrowsingContextInstance(driver, {
  browsingContextId: await driver.getWindowHandle(),
});
const parameters = new CaptureScreenshotParameters().origin(Origin.DOCUMENT);
const screenshot = await context.captureScreenshot(parameters);

await writeFile("selenium-full-page-screenshot.png", screenshot, "base64");
await driver.quit();
That's a lot more code than the one-line fullPage: true that Playwright and Puppeteer need, so here's what each part does:
options.enableBidi()turns on WebDriver BiDi, the bidirectional protocol that carries the full-page command.getBrowsingContextInstancegives you a handle on the current tab.Origin.DOCUMENTis what makes it a full-page capture. The default origin isviewport, which captures only what's visible.
This is a native full-page screenshot rather than a workaround, which is more than Selenium gives you on Chrome in Java or C#. Note though that it doesn't help with lazy-loaded images. Just like Playwright and Puppeteer, BiDi renders the document at its full height without scrolling through it first, so anything that loads on scroll never loads at all. All three libraries scored 0% on our full-page benchmark.
Screenshot a specific element
Here's how to take a screenshot of a specific element in Node.js using Selenium:
import { Browser, Builder, By } from "selenium-webdriver";
import chrome from "selenium-webdriver/chrome.js";
import { writeFile } from "node:fs/promises";

const options = new chrome.Options();
options.addArguments("--headless=new", "--window-size=1920,1080");
const driver = await new Builder()
  .forBrowser(Browser.CHROME)
  .setChromeOptions(options)
  .build();

await driver.get("https://screenshotscout.com/");

const element = await driver.findElement(By.css("#pricing"));
await writeFile(
  "selenium-element-screenshot.png",
  await element.takeScreenshot(),
  "base64",
);

await driver.quit();
You find the element by CSS selector, then call takeScreenshot() on the element instead of on the driver.
Screenshot Scout
Screenshot Scout is a screenshot API. One endpoint takes a GET/POST request and returns the screenshot, either as raw bytes or as JSON with a link to the image file. There's an official Node.js SDK that wraps it, and that's what the examples below use.
Under the hood, every screenshot API (Screenshot Scout included) runs a browser automation framework. What you're buying is that somebody else has already solved the problems a headless browser gives you.
Full disclosure before the list below: Screenshot Scout is our own product, and most of what follows applies to any screenshot API, to a degree. Here's what you get:
- Almost no local RAM/CPU use: all the rendering happens on the API's infrastructure, so your side sends an HTTP request and stops there. No browser launches locally. In our benchmark that came to 88MB of RAM and 0.34 CPU-seconds per screenshot, against 656-1193MB and 1.78-2.24 CPU-seconds for the libraries.
- Better full-page capture: all three libraries scored 0% here, because none of them scrolls the page before capturing. Screenshot Scout scored 55%, which is far from perfect, but it was the only score above zero in this run.
- Improved cookie banner removal: Screenshot Scout removed cookie banners 95.8% of the time, against 87-87.5% for the libraries running an extension built for the job. The gap is small, and this is the benchmark where a well-configured library gets closest.
- Better bot protection bypass: Screenshot Scout scored 94.7% at avoiding bot protection, ahead of Playwright at 84.2% and Puppeteer at 78.9%.
- No maintenance required: run the browser yourself and the upkeep is yours. The library, the ad and cookie extensions, and the stealth plugin all go out of date as sites change their markup and browsers update, and so does anything you wrote around them: a clicker for the cookie banners the extension misses, or a manual fix to the stealth setup. With a screenshot API, none of that is your problem.
- Additional built-in functionality: most screenshot APIs come with extras you'd otherwise build: caching, S3-compatible storage, geographical routing. Screenshot Scout has around 70 screenshot options.
And the downsides:
- Slower per screenshot: 3.1s, about double the libraries. Two reasons for that. Its default readiness signal is the network going quiet rather than the load event, which is the better screenshot but the slower one. And an API request also reads and writes a database and object storage, work a local render never has to do.
- May cost money: the first couple of hundred screenshots a month are free. Past that, you'll need to pay.
To sum this up: use Screenshot Scout when you need production scale and reliability, meaning full pages captured whole, bot protection handled, and nothing rendering on your own machine. If you don't, use whichever library fits your stack. On ad removal the libraries matched Screenshot Scout at 100%, and on cookie banners they scored 87.5% against 95.8%. Neither of those is a reason to pay for an API on its own.
Setup
No browser to install, and no system libraries either. Just the SDK:
npm install @screenshotscout/sdkSign up, copy your access key from the API keys page, and export it as SCREENSHOTSCOUT_ACCESS_KEY. The examples below read it from there.
Viewport screenshot
Here's how you take a viewport screenshot in Node.js using Screenshot Scout:
import { writeFile } from "node:fs/promises";
import { ScreenshotScoutClient } from "@screenshotscout/sdk";

const accessKey = process.env.SCREENSHOTSCOUT_ACCESS_KEY;
if (!accessKey) throw new Error("Set SCREENSHOTSCOUT_ACCESS_KEY first.");

const client = new ScreenshotScoutClient({ accessKey });
const response = await client.capture("https://screenshotscout.com/");
await writeFile("screenshot-scout-screenshot.png", response.bytes);
It's as simple as this:
- Create a client with your access key.
- Call
capture()with the target URL and any other screenshot options. - Write
response.bytesto a file.
Full-page screenshot
Here's how you take a full-page screenshot in Node.js using Screenshot Scout:
import { writeFile } from "node:fs/promises";
import { ScreenshotScoutClient } from "@screenshotscout/sdk";

const accessKey = process.env.SCREENSHOTSCOUT_ACCESS_KEY;
if (!accessKey) throw new Error("Set SCREENSHOTSCOUT_ACCESS_KEY first.");

const client = new ScreenshotScoutClient({ accessKey });
const response = await client.capture("https://screenshotscout.com/", {
  fullPage: true,
});
await writeFile("screenshot-scout-full-page-screenshot.png", response.bytes);
One option, fullPage: true, and that's it. Nothing to scroll, no BiDi to enable, no viewport to resize.
Screenshot a specific element
And here's an element screenshot in Node.js with Screenshot Scout:
import { writeFile } from "node:fs/promises";
import { ScreenshotScoutClient } from "@screenshotscout/sdk";

const accessKey = process.env.SCREENSHOTSCOUT_ACCESS_KEY;
if (!accessKey) throw new Error("Set SCREENSHOTSCOUT_ACCESS_KEY first.");

const client = new ScreenshotScoutClient({ accessKey });
const response = await client.capture("https://screenshotscout.com/", {
  selector: "#pricing",
});
await writeFile("screenshot-scout-element-screenshot.png", response.bytes);
Pass the CSS selector through the selector option and the API returns only that element.
Benchmarks
I needed to know which tool to recommend by default, and which one fits which use-case, so I measured all four across two groups of benchmarks: performance and reliability.
The performance benchmarks:
- Wall time (s): how long one screenshot takes end to end, from the moment you ask for it to the moment you have the image.
- Peak RAM (MB): the most RAM the tool's process tree held at any point during a single screenshot.
- CPU-seconds: the local CPU time that process tree consumed to produce that screenshot.
- Avg cores used: how many CPU cores were kept busy on average while a capture ran. Calculated as CPU-seconds divided by wall time, not measured directly.
- CPU load (% of 2-core VPS): how much of the whole machine a single capture occupied. Calculated as avg cores used divided by the 2 vCPUs on the test box.
The reliability benchmarks:
- Cookie banner removal (%): how often the tool got rid of the cookie banner.
- Ad removal (%): how often it got rid of the ads.
- Full-page capture (%): how often the screenshot matched the page exactly. I graded this one strictly: a single lazy-loaded image that never appeared was enough to fail the whole screenshot.
- Bot protection bypass (%): how often the tool got the real page back instead of a block screen. "Bypass" is shorthand: nothing was actively circumvented, each tool was just configured properly and given an off-the-shelf stealth package.
Methodology
Here's how the run was set up and graded, and how to reproduce it:
- Environment: a Docker container built from the repo's Dockerfile (base image
node:24.19.0-bookworm, so Debian 12), running on a Hetzner CCX13: AMD EPYC-Milan, 2 vCPU, ~7.6GB RAM. Node.js 24.19.0 inside the container. - Versions and date: Playwright 1.62.1, Puppeteer 25.5.0, selenium-webdriver 4.46.0, @screenshotscout/sdk 0.1.2. The stealth packages, which only appear in the bot protection test, all come from Zorilla, a maintained fork of puppeteer-extra:
@zorilla/playwright-extra2.0.0 for Playwright,@zorilla/puppeteer-extra2.0.2 for Puppeteer, both driving@zorilla/puppeteer-extra-plugin-stealth2.0.1, and@zorilla/extract-stealth-evasions2.0.2 for Selenium. Each tool used its own browser: Playwright its bundled Chromium (151.0.7922.34), Puppeteer its bundled Chrome for Testing (151.0.7922.71), and Selenium a Chrome for Testing build (151.0.7922.76) with the matching ChromeDriver, both provisioned by Selenium Manager. The two cleanup extensions were uBlock Origin Lite 2026.729.1529 for ads and I Still Don't Care About Cookies v1.1.9 for banners. Measured August 2026. - Performance method: one viewport screenshot of the same page, Screenshot Scout's homepage, repeated 20 times per tool. Every metric was recorded together, per capture, and I report the median of each. Sampling covered the full process tree, browser children included, every 50ms. Each capture was a cold start (launch, capture, close) inside a fresh Node.js worker, and 2 warm-ups ran ahead of the measured set, recorded but left out of the medians.
- Reliability method: four separate page lists, 20 to 24 real pages each, every page picked because it carries the feature under test. One capture per page per tool. Every tool ran on its own default readiness behavior, which means the load event for Playwright and Puppeteer, the document load that
driver.getwaits for in Selenium, and networkidle2 for Screenshot Scout. On top of that, each capture waited a further 2 seconds so the feature had time to show up. The harness did nothing but produce PNGs. I graded every one of them myself, by eye, marking pass, fail, or N/A. - Per-benchmark specifics: ads are judged on full-page screenshots, since ads usually sit below the first viewport; cookie banners and bot protection are judged on viewport screenshots; the full-page test runs with cleanup and stealth switched off entirely. In the cleanup tests the libraries run uBlock Origin Lite for ads and I Still Don't Care About Cookies for banners, and Screenshot Scout runs
blockAds: trueandblockCookieBanners: true. - The fairness rule: every benchmark used either an off-the-shelf package or the tool's own built-in option, and no bespoke code was written to win a benchmark. That's worth spelling out for full-page capture, because it's what put all three libraries at 0%. Each tool ran its own built-in mode and nothing else, Selenium's BiDi document-origin capture included, since that's the idiomatic route in Node.js. In Java and C#, Selenium has no such option on Chrome, so those articles ran a two-pass measure-and-resize workaround instead, which scored 78.9% and 84.2%. Nothing here got that workaround. On bot protection, each library ran its matching Zorilla package, and Screenshot Scout ran on its default settings, using none of the techniques to prevent CAPTCHAs.
- N/A handling: some screenshots couldn't be graded fairly, either because the capture errored or because a block screen came back instead of the page. I marked those N/A and left them out of the calculation. Every score below is the number of passes divided by the number of screenshots I could grade, and both counts are in the tables and in the raw CSVs, so you can check any of them yourself.
- Who graded: I did, by hand, one screenshot at a time. Oleksii Velykyi, founder of Screenshot Scout, writing this article.
- Reproducibility: the code, the Dockerfile, and the page lists are all in a public GitHub repository: github.com/screenshotscout/nodejs-screenshot-benchmarks. Rebuild the image, run the container, re-run everything. The raw output behind this article is downloadable in two pieces: results.zip for the CSVs and run metadata, and screenshots.zip for every screenshot I graded.
Performance results
Here are the results I got from performance testing:
| Tool | Wall time (s) | Peak RAM (MB) | CPU-seconds | Avg cores used | CPU load (% of 2-core VPS)* |
|---|---|---|---|---|---|
| Playwright | 1.4 | 656 | 1.78 | 1.25 | 63% |
| Puppeteer | 1.6 | 1063 | 2.24 | 1.38 | 69% |
| Selenium | 1.5 | 1193 | 2.11 | 1.43 | 72% |
| Screenshot Scout (API) | 3.1 | 88 | 0.34 | 0.11 | 5% |
* CPU load = avg cores used ÷ 2 vCPUs.
Let's look at each metric.
Wall time
Playwright is the fastest of the four at 1.4s per screenshot, Selenium follows at 1.5s and Puppeteer at 1.6s, and Screenshot Scout is the slowest at 3.1s. This is attributed to these two reasons:
- The tools wait for different signals. Playwright/Puppeteer/Selenium capture as soon as the load event fires, which is the default in all three, while Screenshot Scout waits until the network goes quiet. The load event comes first, which is why the libraries record lower wall times, but it can also come before every lazy-loaded image has finished loading. So the libraries are quicker, and the price is an occasional missing image.
- A screenshot API request costs a network round trip plus the database and object storage reads and writes on every capture. A local render does none of that.
Note though that the three libraries finished within 220ms of each other (1.4-1.6s), so wall time on its own isn't much of a reason to prefer one over another. The bigger difference is RAM.
Peak RAM
Selenium is the heaviest on RAM at 1193MB per screenshot, with Puppeteer close behind at 1063MB. Playwright is the lightest of the three libraries at 656MB, a little over half of Selenium's figure. Screenshot Scout is the lightest overall at 88MB, which is expected: no browser starts locally, so what you're measuring is a Node.js process holding an HTTPS connection open, not a Chromium rendering a page.
This is the widest spread of any metric here, and the one most likely to decide things for you.
CPU usage
Puppeteer is the heaviest on CPU time at 2.24 CPU-seconds per screenshot, Selenium is next at 2.11, and Playwright is the lightest of the libraries at 1.78.
To put CPU-seconds in perspective, Puppeteer's 2.24 is equivalent to 1.38 vCPU-cores fully busy for the duration of a capture. On the 2-vCPU box we tested on, that's 69% of the entire machine occupied by a single screenshot for the roughly 1.6 seconds it takes.
Note though that the heaviest tool on CPU-seconds isn't the heaviest on CPU load. Selenium spends less total CPU time than Puppeteer (2.11 against 2.24) but finishes sooner, which puts its load higher: 1.43 cores busy, or 72% of the box, the highest of the four. If what you care about is total compute, Puppeteer is the heavier tool. If it's how much of the machine is busy while a screenshot renders, Selenium is.
Those are averages, though, and they don't show the peaks. Here's htop during the Playwright performance benchmark:
One core at 85.2%, the other at 63.5%. That's a single screenshot from the lightest tool of the three, on an otherwise idle machine.
Screenshot Scout used 0.34 CPU-seconds per screenshot, roughly a fifth of Playwright's 1.78, and 5% of the box. None of that is rendering, which happens on Screenshot Scout's infrastructure. What you're measuring locally is a fresh Node.js process starting and making one HTTPS call, and Node starts cheaply, so there's no large runtime startup cost inside that number. Keep that process alive across captures and it falls further still. The libraries have no equivalent saving: every capture is another Chromium launch and another render.
It's worth noting that the page we captured here, Screenshot Scout's homepage, is a light one running on Vercel. Anything you'd screenshot in the wild is likely heavier than that, which means more time and more CPU than the figures above.
Summary
Screenshot Scout trades latency for a large local RAM/CPU offload: 3.1s against 1.4-1.6s, roughly double. Choosing a library instead wins that latency back, but only if you have the RAM and CPU to spare. If you don't, rendering screenshots locally will degrade everything else running on that server or cloud instance.
Among the libraries the result is clear. Playwright won all three performance metrics: the fastest, the lightest on RAM by a wide margin, and the lowest on CPU. Puppeteer is the slowest and the heaviest on CPU time. Selenium is the heaviest on RAM and puts the highest load on the box, though it does beat Puppeteer on speed.
It's also worth noting how the Node.js libraries compare to other languages. They're at the fast end of everything we've benchmarked, at 1.4-1.6s per screenshot, against 1.6-1.7s for C#, 2.1-2.2s for Python, and 2.8-3.1s for Java. PHP is the only one in the same range, and its quickest tool beat everything here at 1.1s. Much of that difference is runtime startup: every capture in these benchmarks is a cold start, and Node.js starts up far more cheaply than the JVM. On RAM they're comparable (656-1193MB here, 623-903MB for Python, 873-1231MB for PHP, 711-1154MB for Java). Keep a process warm and the wall-time gaps narrow, but cold start is what you'd see if each screenshot gets its own invocation, as it does in a serverless function.
Reliability results
Here's how each tool scored on reliability:
| Tool | Cookie banners removed (%) | Ads removed (%) | Full-page capture (%) | Bot protection bypass (%) |
|---|---|---|---|---|
| Playwright | 87.5% (21/24) | 100% (14/14; 6 N/A) | 0% (0/20) | 84.2% (16/19; 1 N/A) |
| Puppeteer | 87.5% (21/24) | 100% (14/14; 6 N/A) | 0% (0/20) | 78.9% (15/19; 1 N/A) |
| Selenium | 87% (20/23; 1 N/A) | 100% (14/14; 6 N/A) | 0% (0/20) | 11.1% (2/18; 2 N/A) |
| Screenshot Scout | 95.8% (23/24) | 100% (19/19; 1 N/A) | 55% (11/20) | 94.7% (18/19; 1 N/A) |
Let's look at each test.
Cookie banner removal
Here's one page captured by all 4 tools (click to open in a new tab). I deliberately picked a page the libraries missed, so you can see what a failure looks like: the cookie banner still covers the content in the three library screenshots, and it's gone in the Screenshot Scout one.
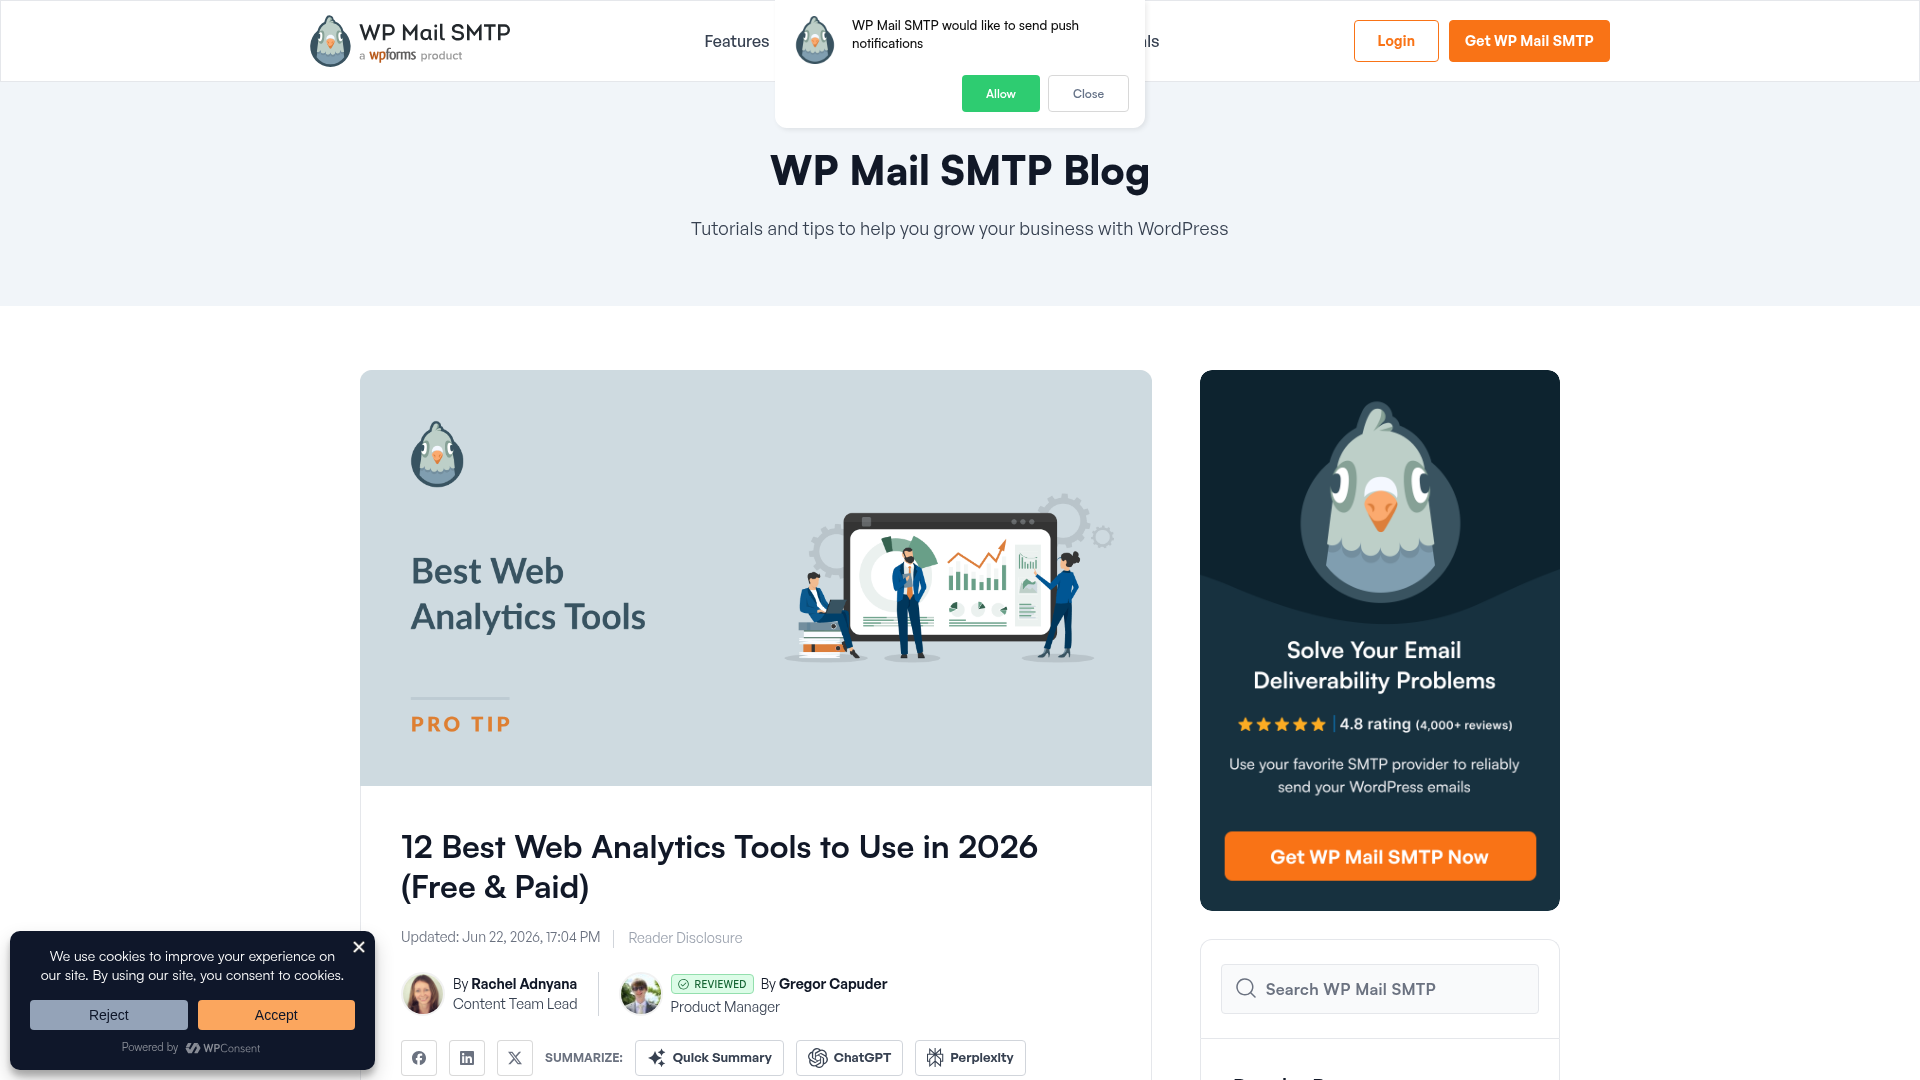
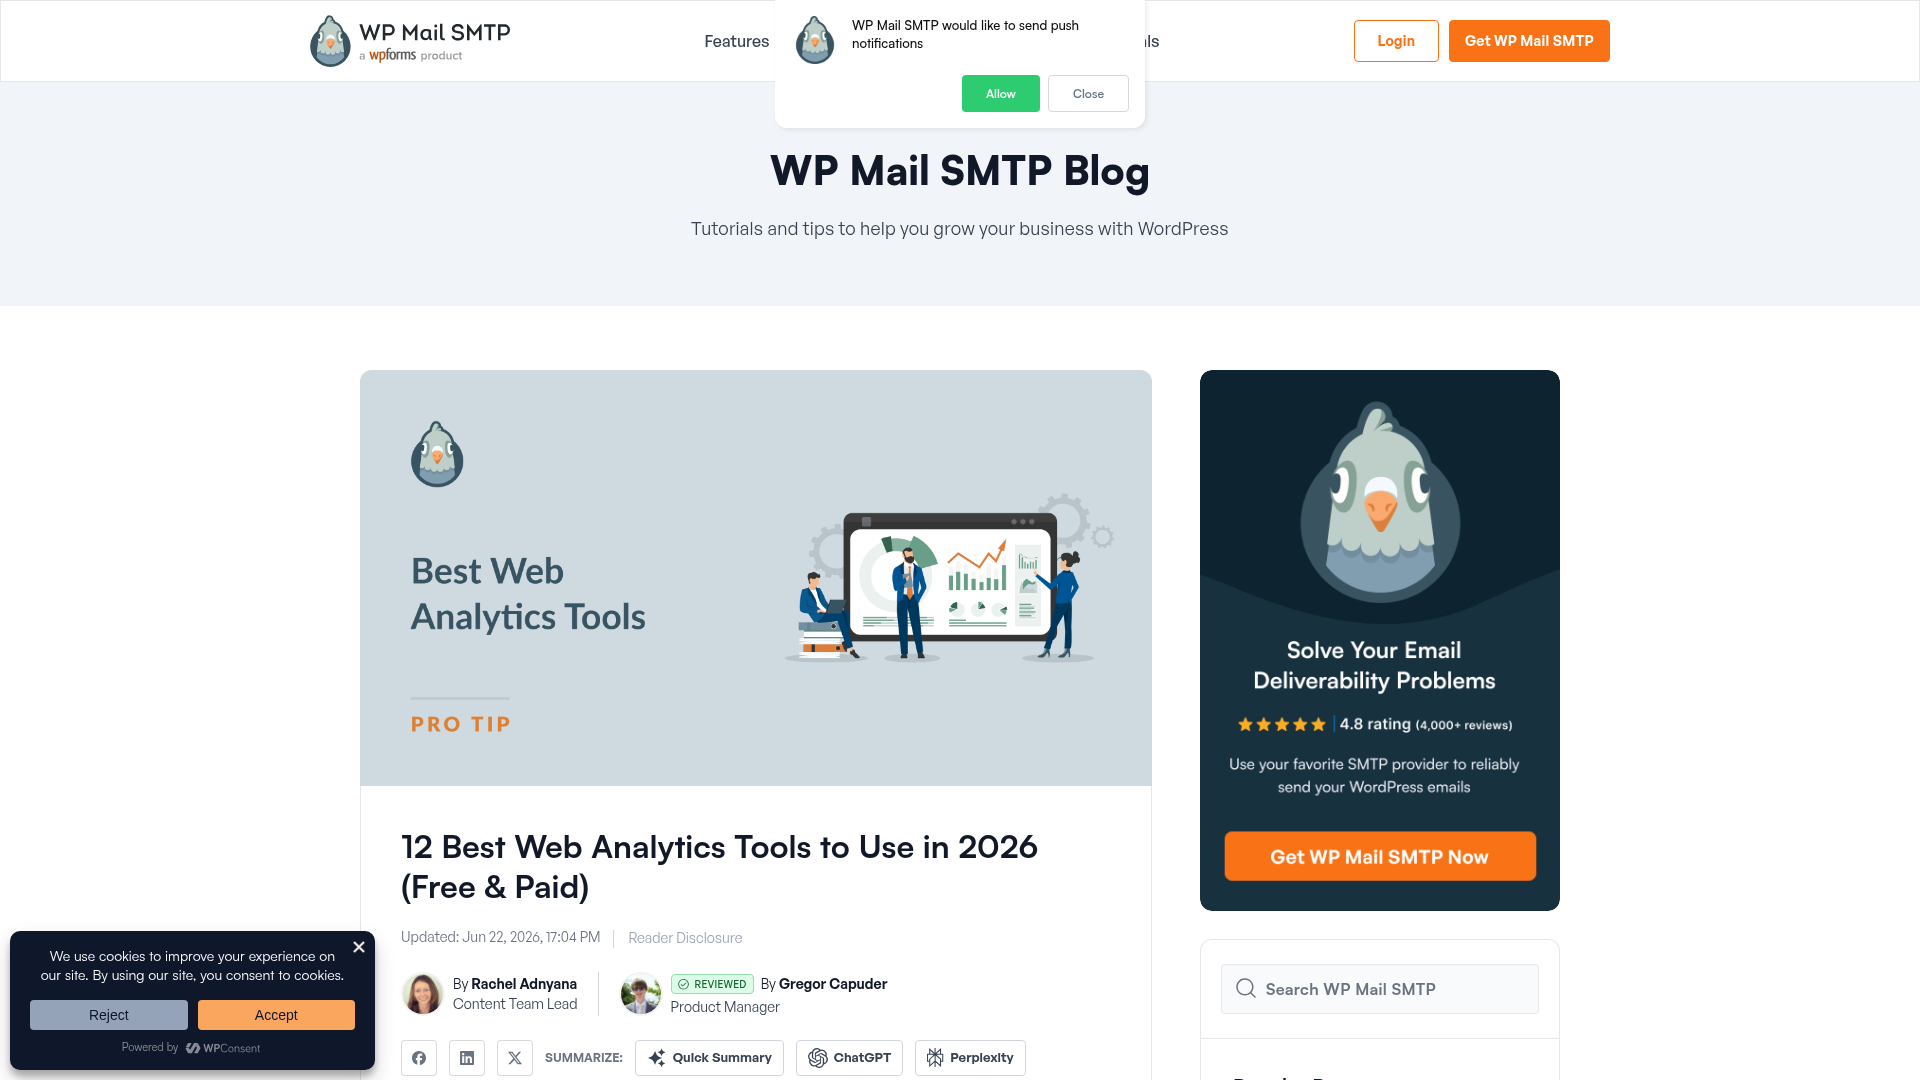
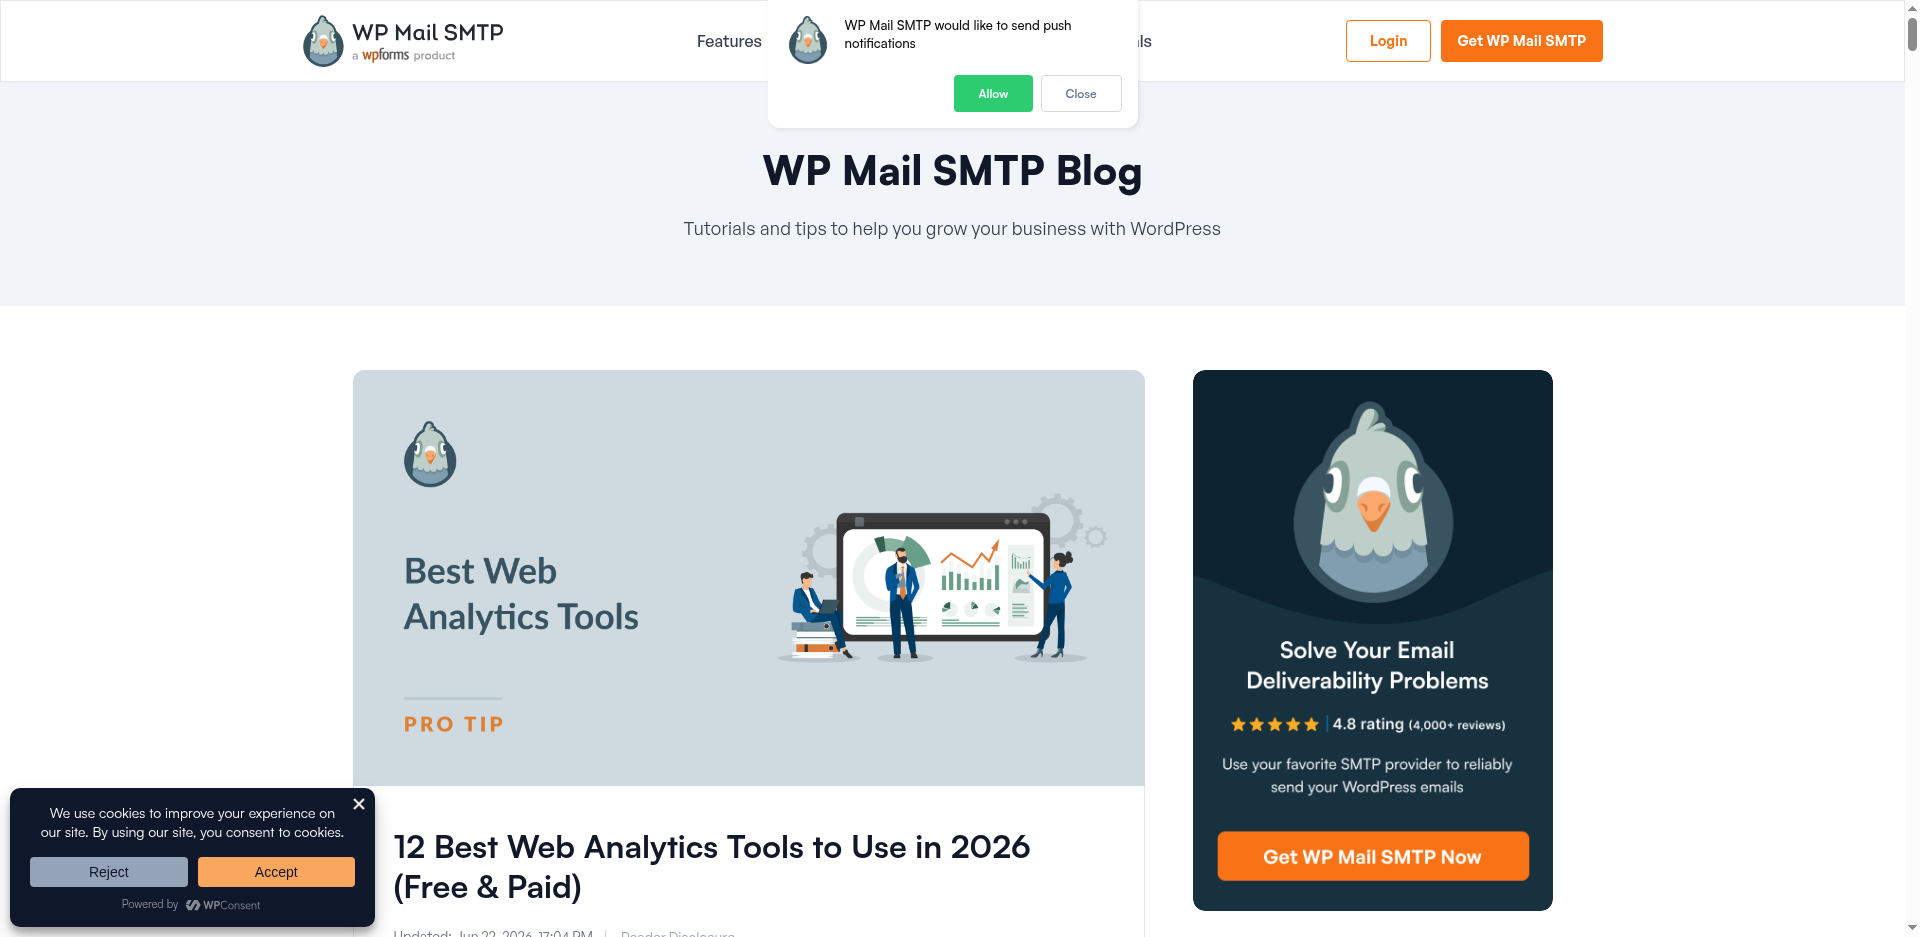
On the cookie banner removal test, Playwright and Puppeteer both scored 87.5% (21/24), Selenium scored 87% (20/23; 1 N/A), and Screenshot Scout scored 95.8% (23/24).
The extension is doing the work here, not the libraries. All three ran I Still Don't Care About Cookies, which is built for exactly this job and strips both the standard third-party consent boxes and a lot of the custom ones sites write for themselves. In our Python, PHP, and Java benchmarks the libraries had uBlock Origin Lite and its cookie and annoyance rulesets doing that job, a general-purpose blocker rather than a specialist, and they scored around 45%. Swap in the dedicated extension and the score roughly doubles.
A few things worth noting here, though:
- This is visual removal for the sake of a screenshot, not consent management. Nothing here decides what a real user would have agreed to.
- All three libraries missed the same three pages, which is the useful part of the number. It isn't that each library is 87.5% reliable in some general sense. It's that a few pages defeat the extension no matter which library drives the browser.
- Screenshot Scout cleared all three of those, then missed a fourth page every library handled. So the two approaches fail on different pages, rather than one being better everywhere.
The honest read: on cookie banners, a well-configured Node.js library is close to the API. Eight percentage points separate them.
Ad removal
The same exercise for ads (click to open in a new tab), and this time the ads are gone in all 4.
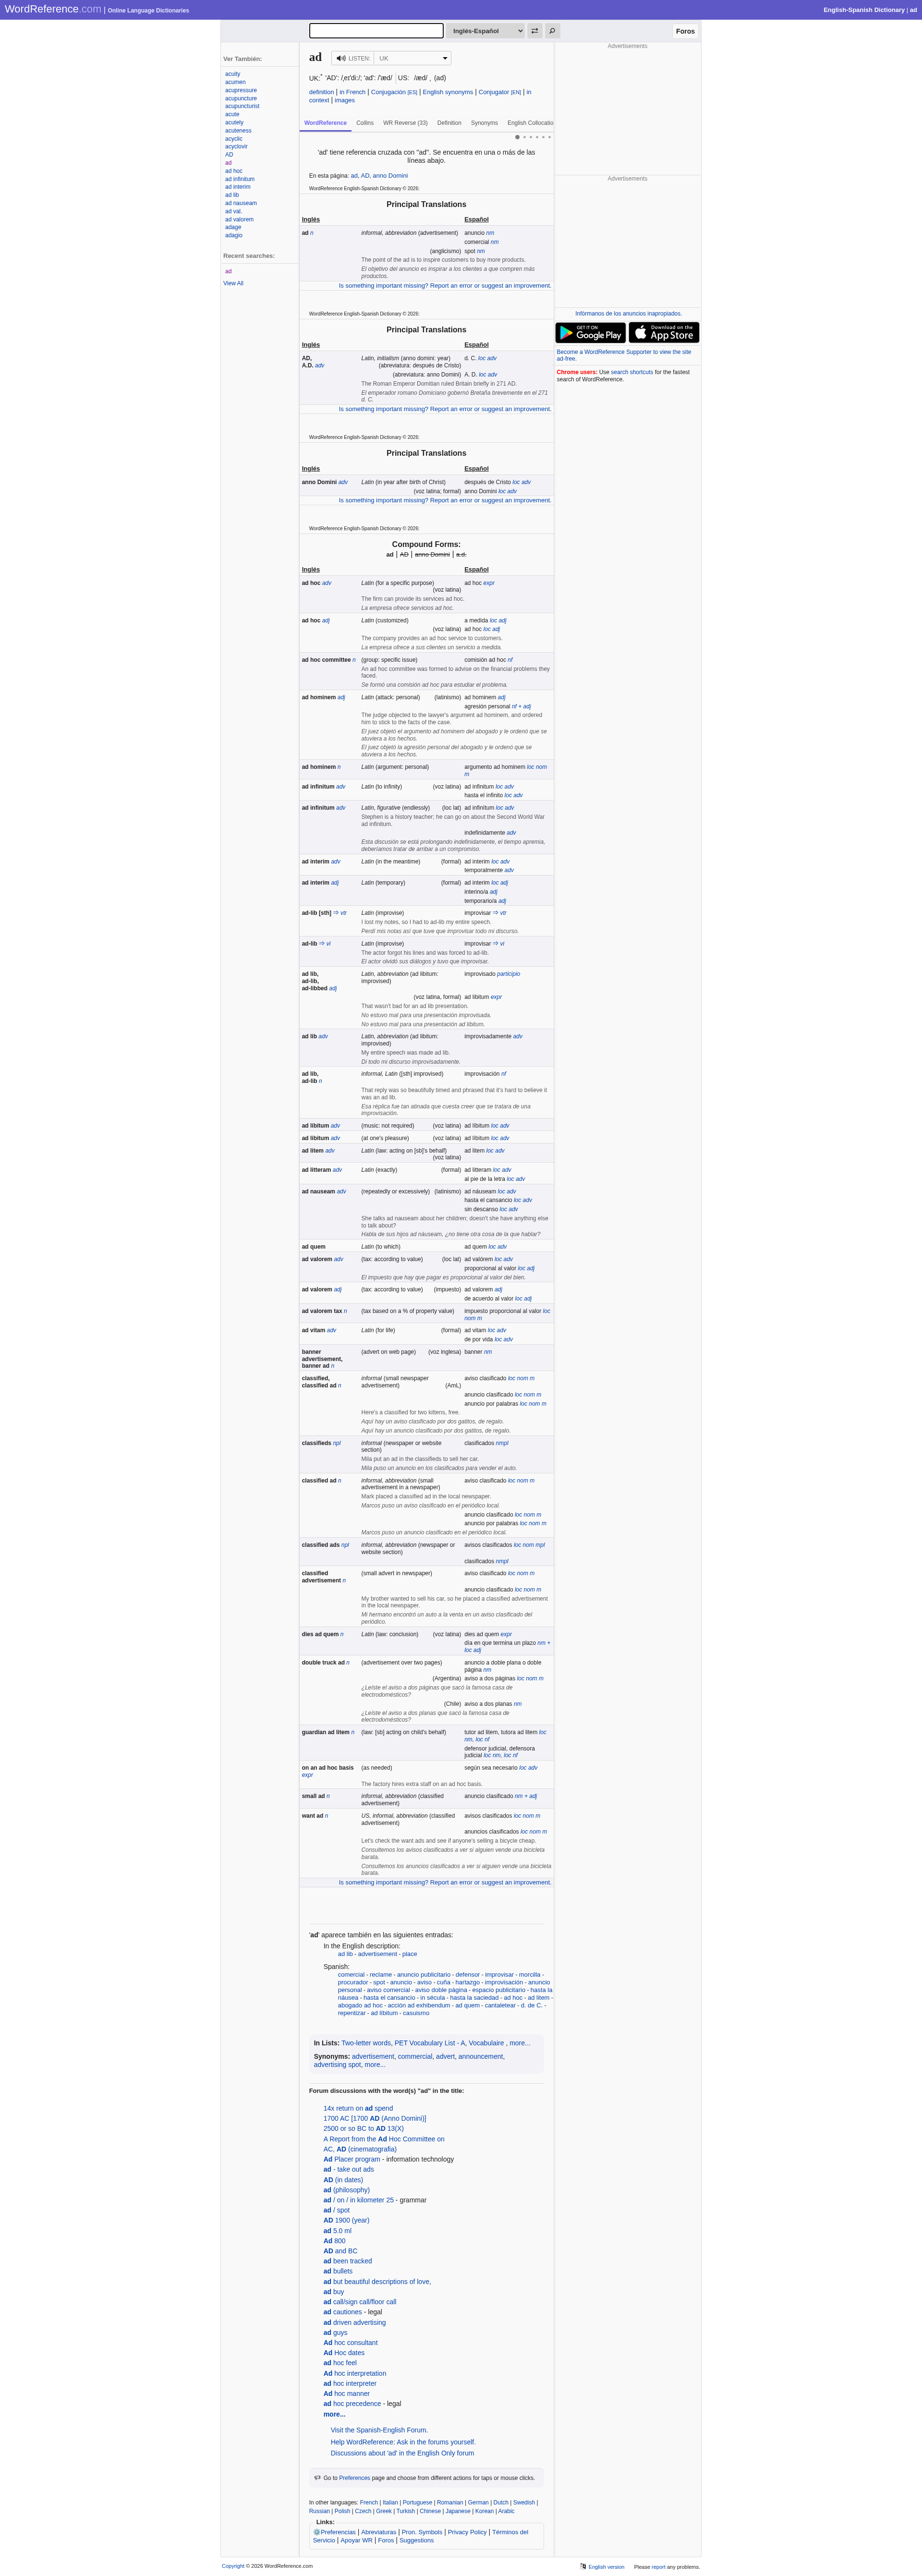
Every tool scored 100% and stripped the ads. All three libraries run uBlock Origin Lite here, so matching scores are what you'd expect.
So if ads are the only thing you need removed, there's no need for a screenshot API. Any of the libraries will do.
A few things worth noting here, though:
- The libraries' scores were calculated on a smaller set than Screenshot Scout's, 14 gradeable pages against 19. Ad-heavy sites tend to be bot-protected sites, and the ad benchmark runs without stealth, so six pages dropped out: five returned a block screen (or a blank one) instead of the article, and one failed to load at all.
- Removing an ad doesn't always collapse the container that held it, so a few screenshots have a blank rectangle in place of the ad. This behavior may differ from site to site.
- Only ad-network ads were removed. Native ads, the ones a site sells and serves itself, were still visible on at least some pages. Read the 100% as "the ad networks were blocked", not as "the page has nothing promotional left on it".
Full-page capture
One more page, this time captured full-page by all 4 tools (click to open in a new tab). The lazy-loaded images below the fold are missing from all three library captures, and present in the Screenshot Scout one.
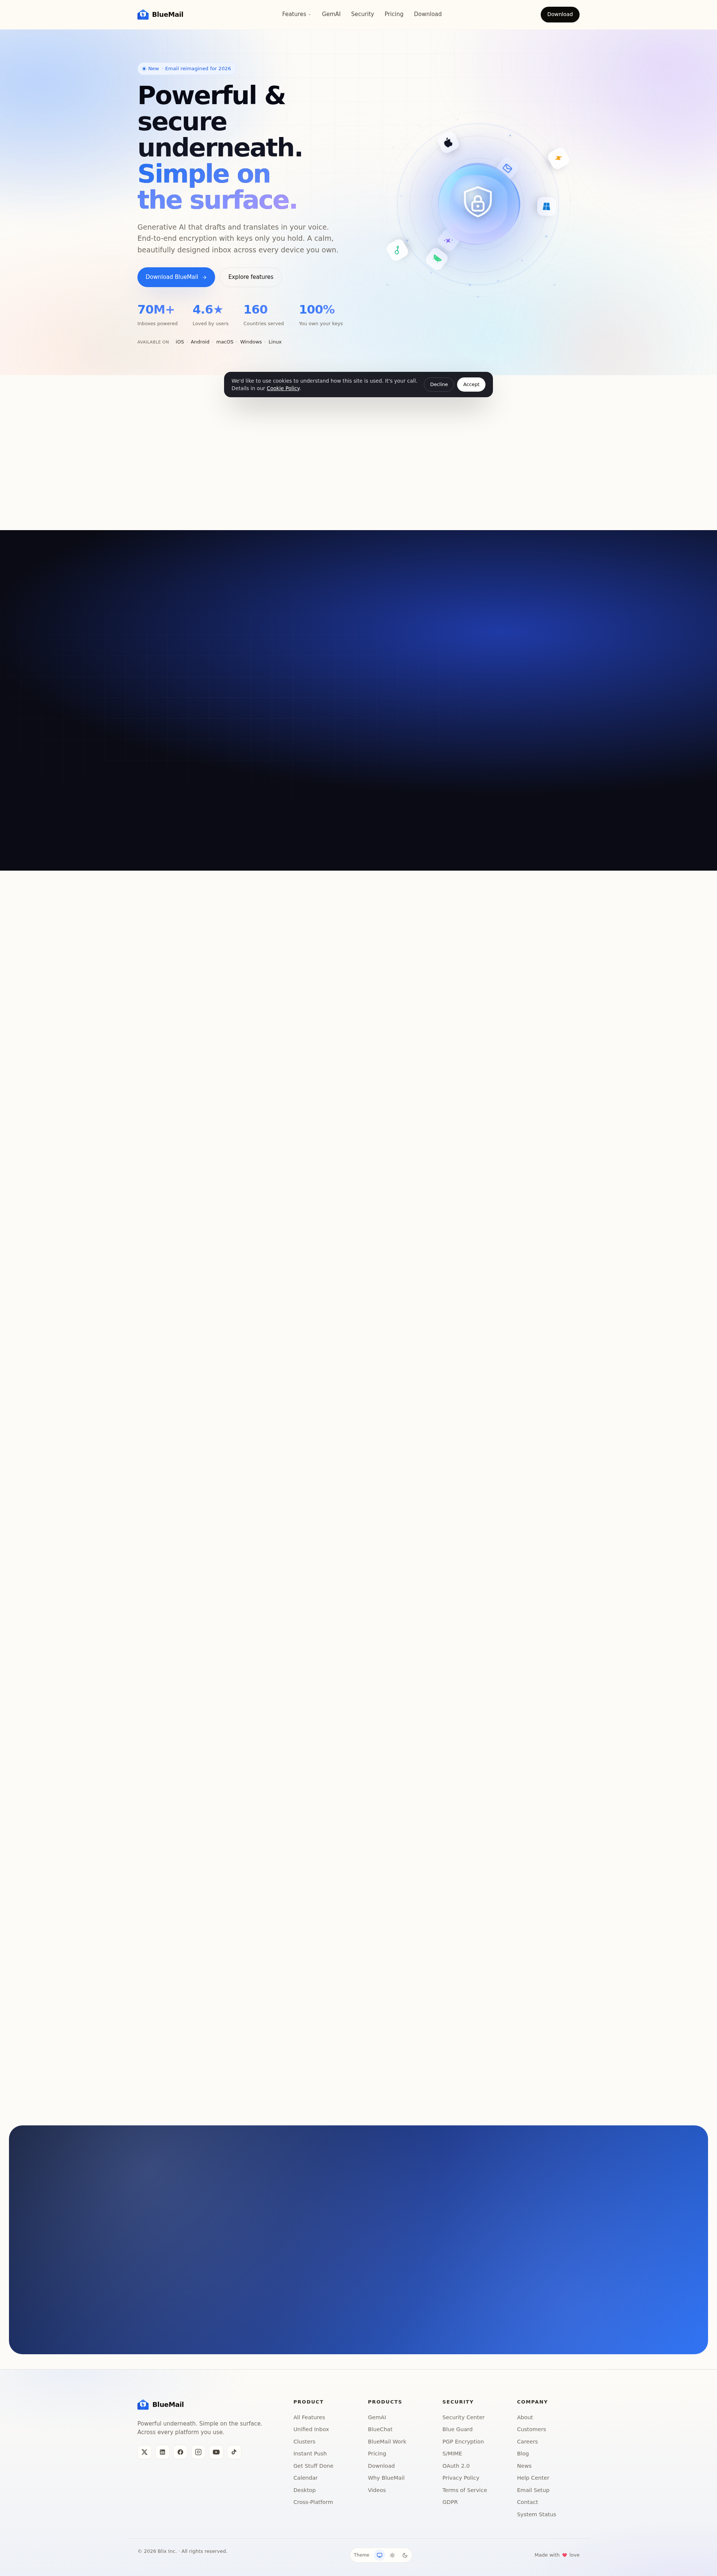
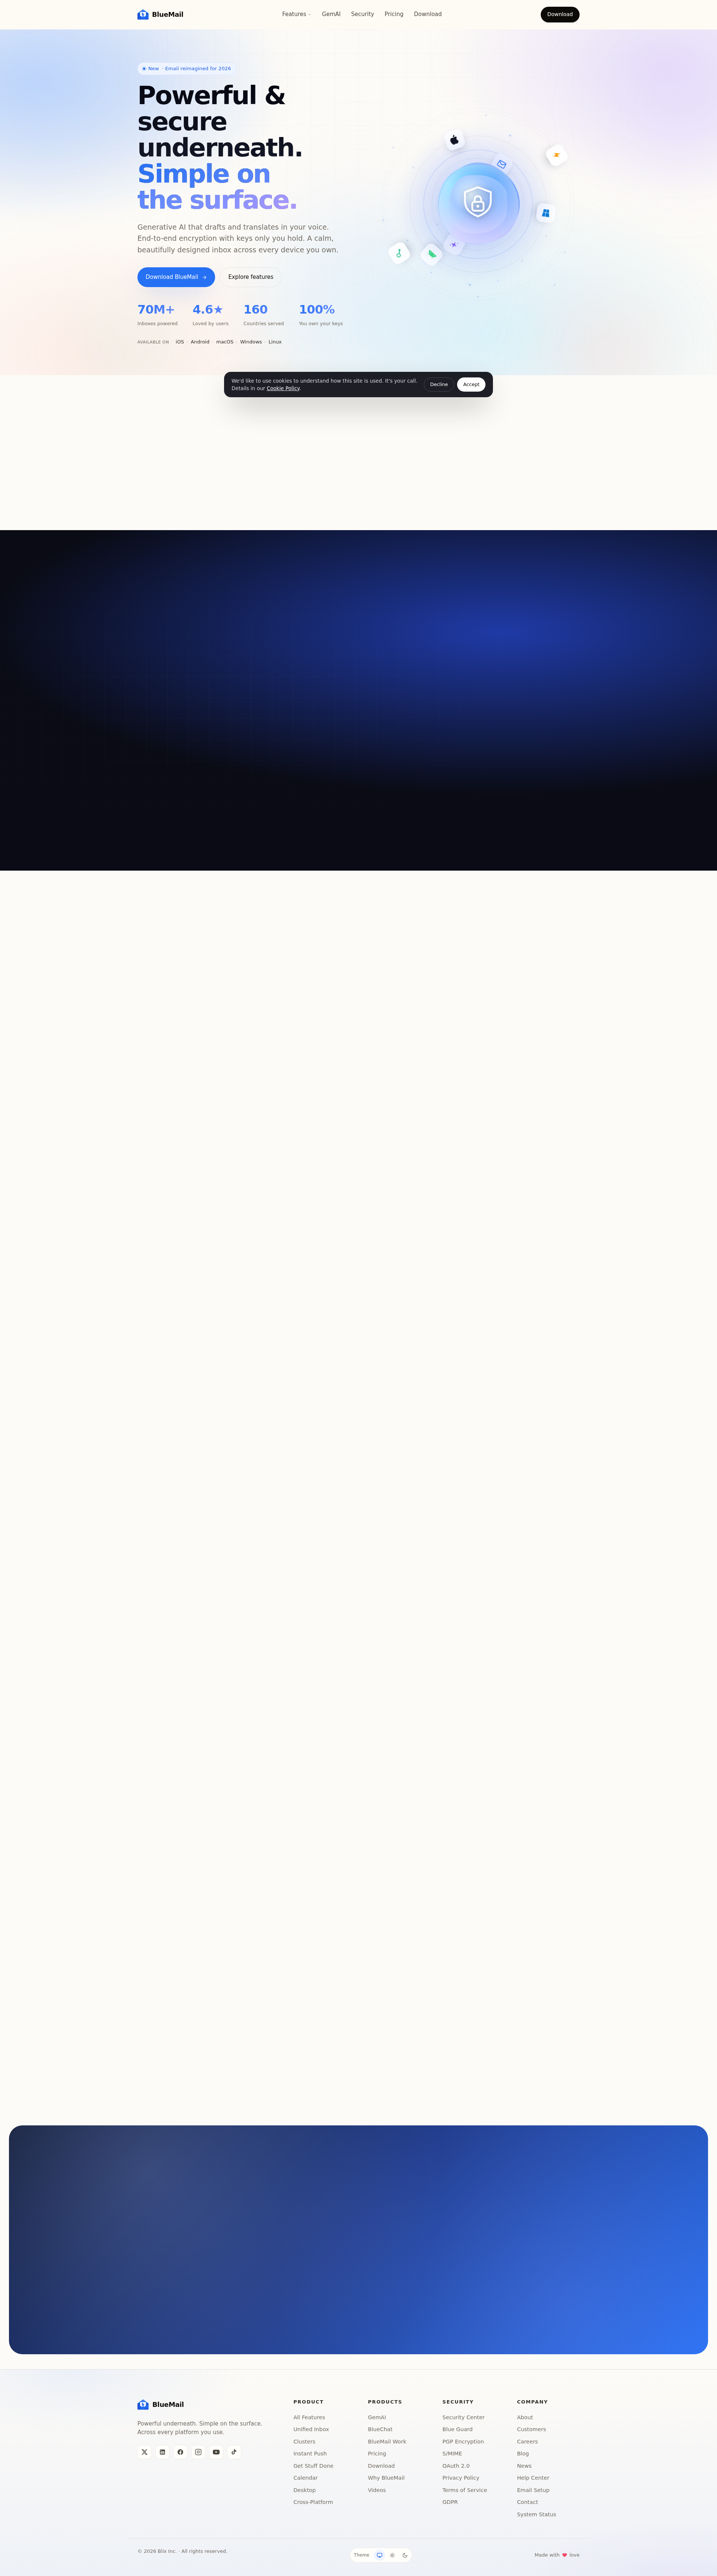
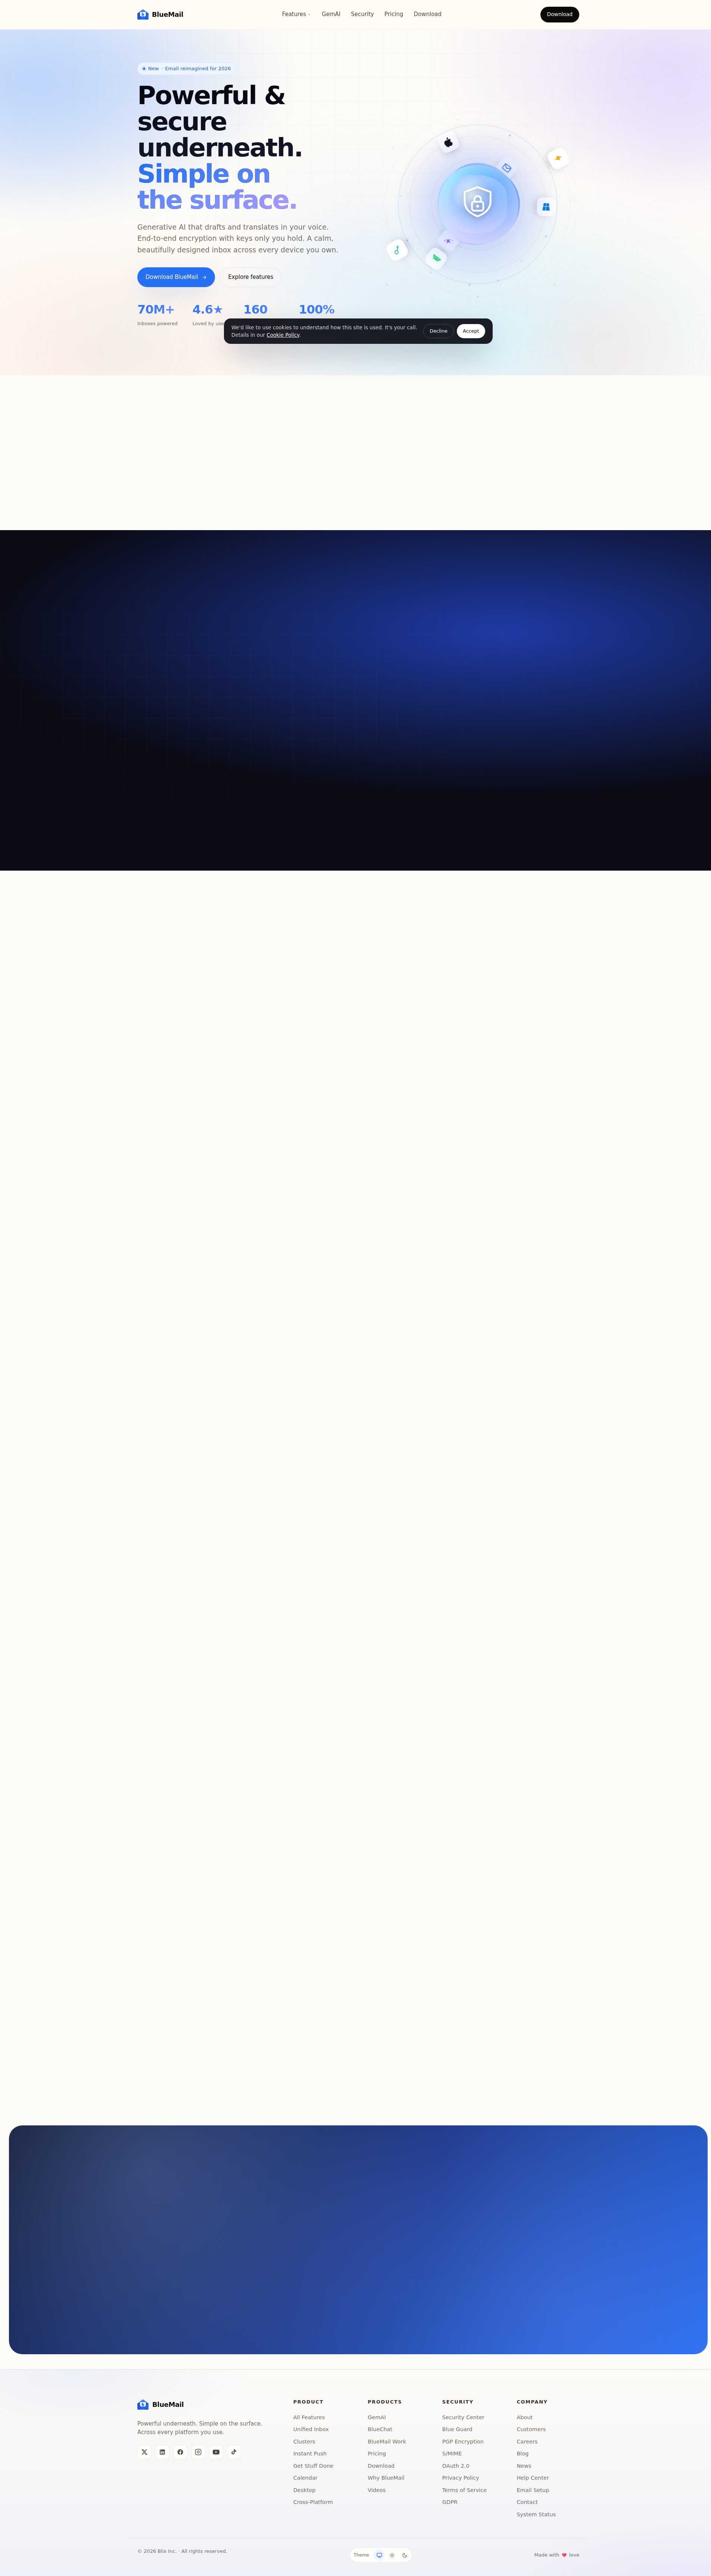
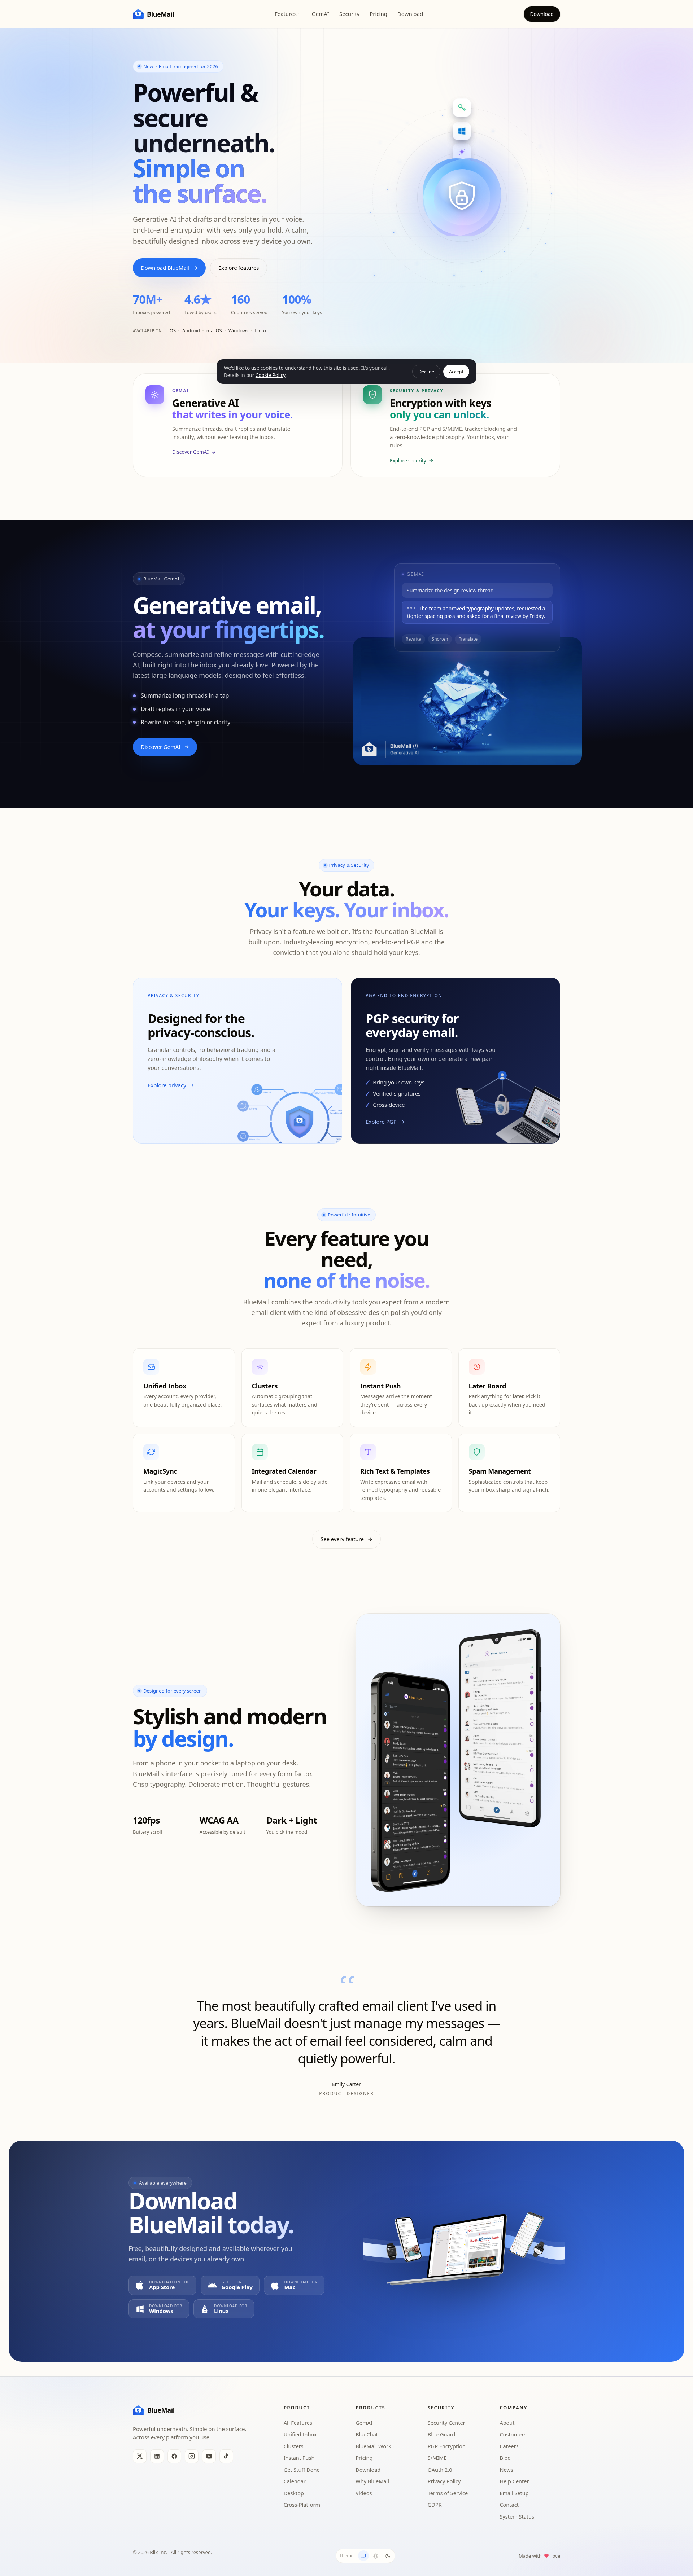
On the full-page capture test, Playwright, Puppeteer, and Selenium all scored 0% (0/20), while Screenshot Scout scored 55% (11/20).
This is the widest gap in the article, and also the result that needs the most explanation.
Every library failed all 20 pages for the same reason: none of them scrolls the page before capturing. Playwright's and Puppeteer's fullPage: true and Selenium's BiDi document-origin capture all render the document at its full height in one pass, so images that only start loading when they're scrolled into view never start loading at all. Every one of those 60 screenshots is graded lazy-loaded images are not visible in the raw CSV. The failure is uniform because the cause is the same protocol-level behavior in the same browser engine.
To be clear about what that 0% does and doesn't mean: this run used each tool's native full-page mode and nothing else. Add a scroll pass before capturing, or the measure-and-resize workaround that scored 78.9% and 84.2% in our Java and C# runs, and these numbers would look very different. The 0% measures the built-in option, not the best a competent developer could do with these libraries.
Screenshot Scout's 55% deserves the same scrutiny. It uses scroll-and-stitch, which is what fixes the lazy-loading problem, but it brings problems of its own. The 9 failures are recorded page by page in reliability_raw.csv inside the results.zip, and they were varied: a distorted header menu on one, a visible seam where two viewport captures were joined on another, a blank band above the footer on a third, and a few where lazy-loaded content still didn't appear. Two of them failed on content in the very first viewport, which has nothing to do with stitching.
It's worth noting that despite the imperfect score, the large majority of the Screenshot Scout screenshots would be acceptable for most production use-cases. The seam distortion happened on one page, and the rest of the issues were minor. The library screenshots are a different matter: every one of them was missing lazy-loaded images.
Bot protection bypass
Here's a page behind bot protection, run through all 4 tools (click to open in a new tab). Playwright, Puppeteer, and Screenshot Scout came back with the real page. Selenium got a 403.
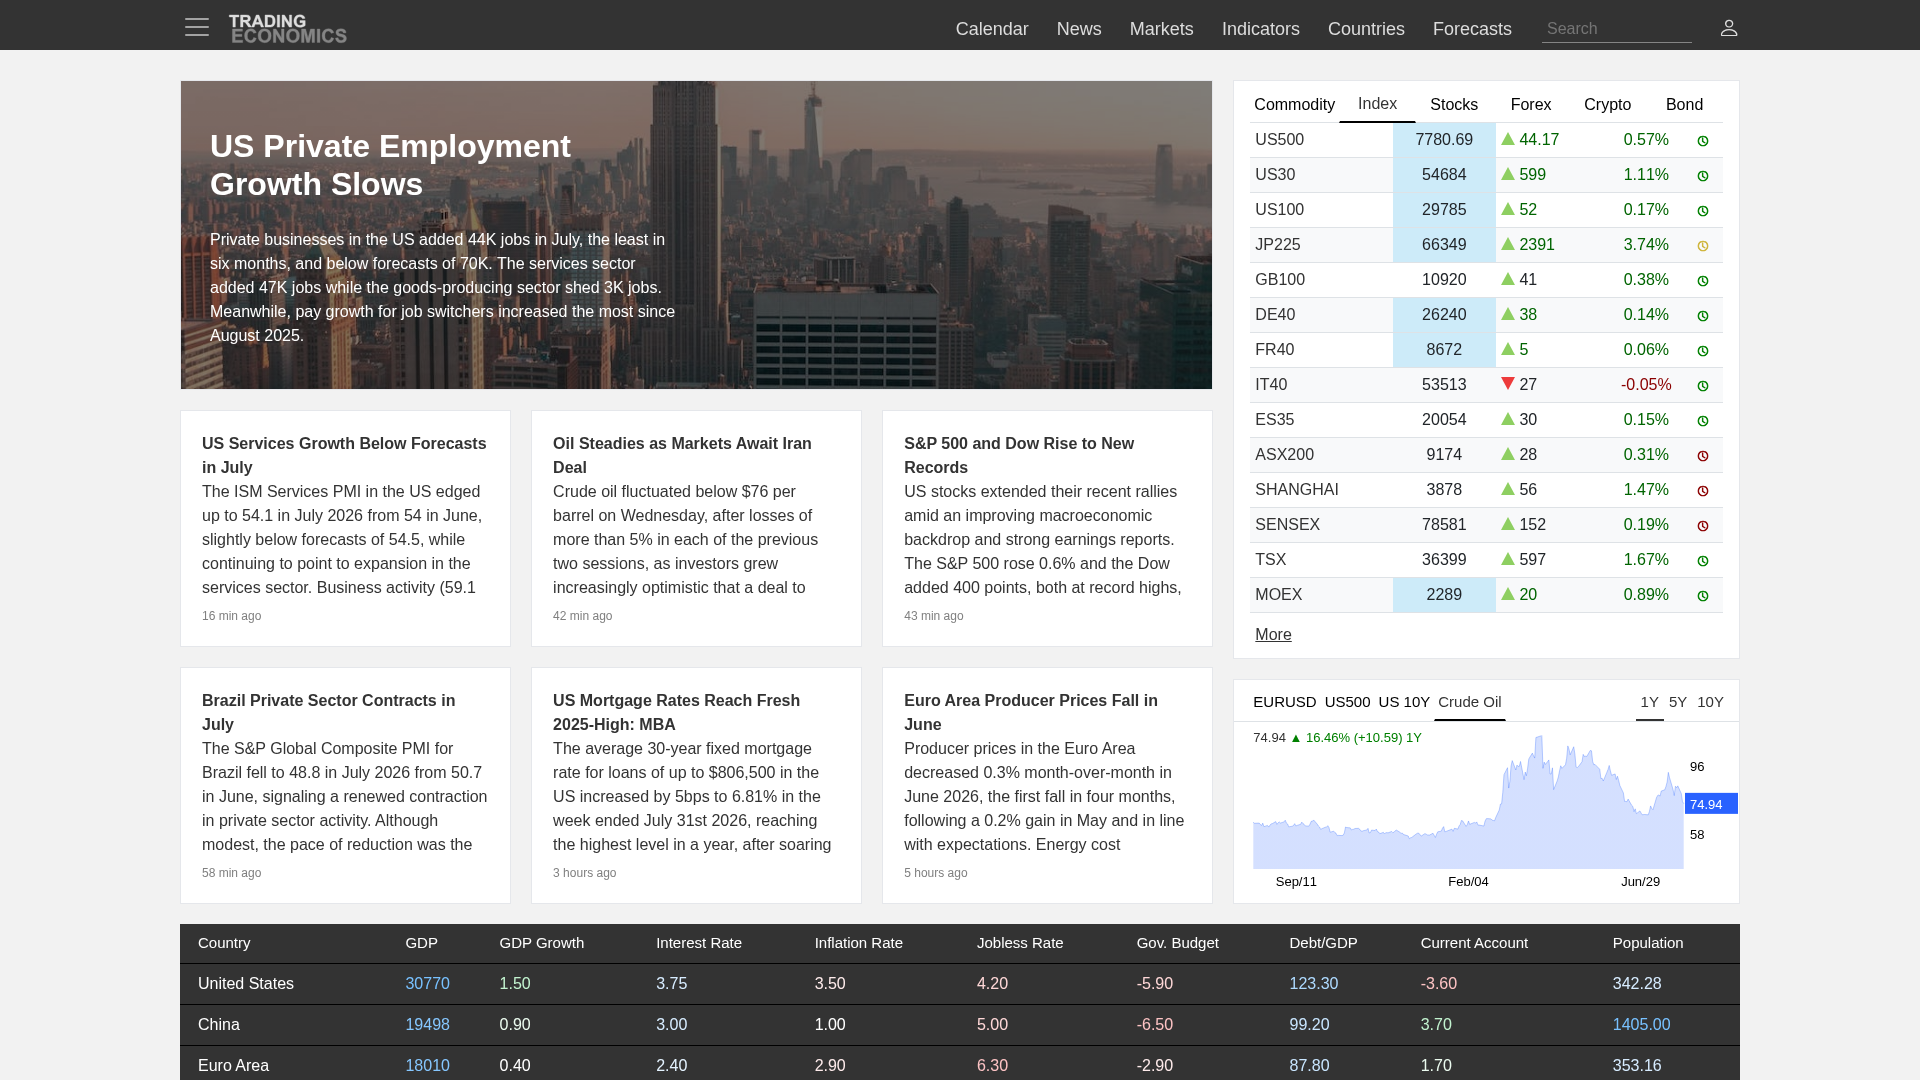
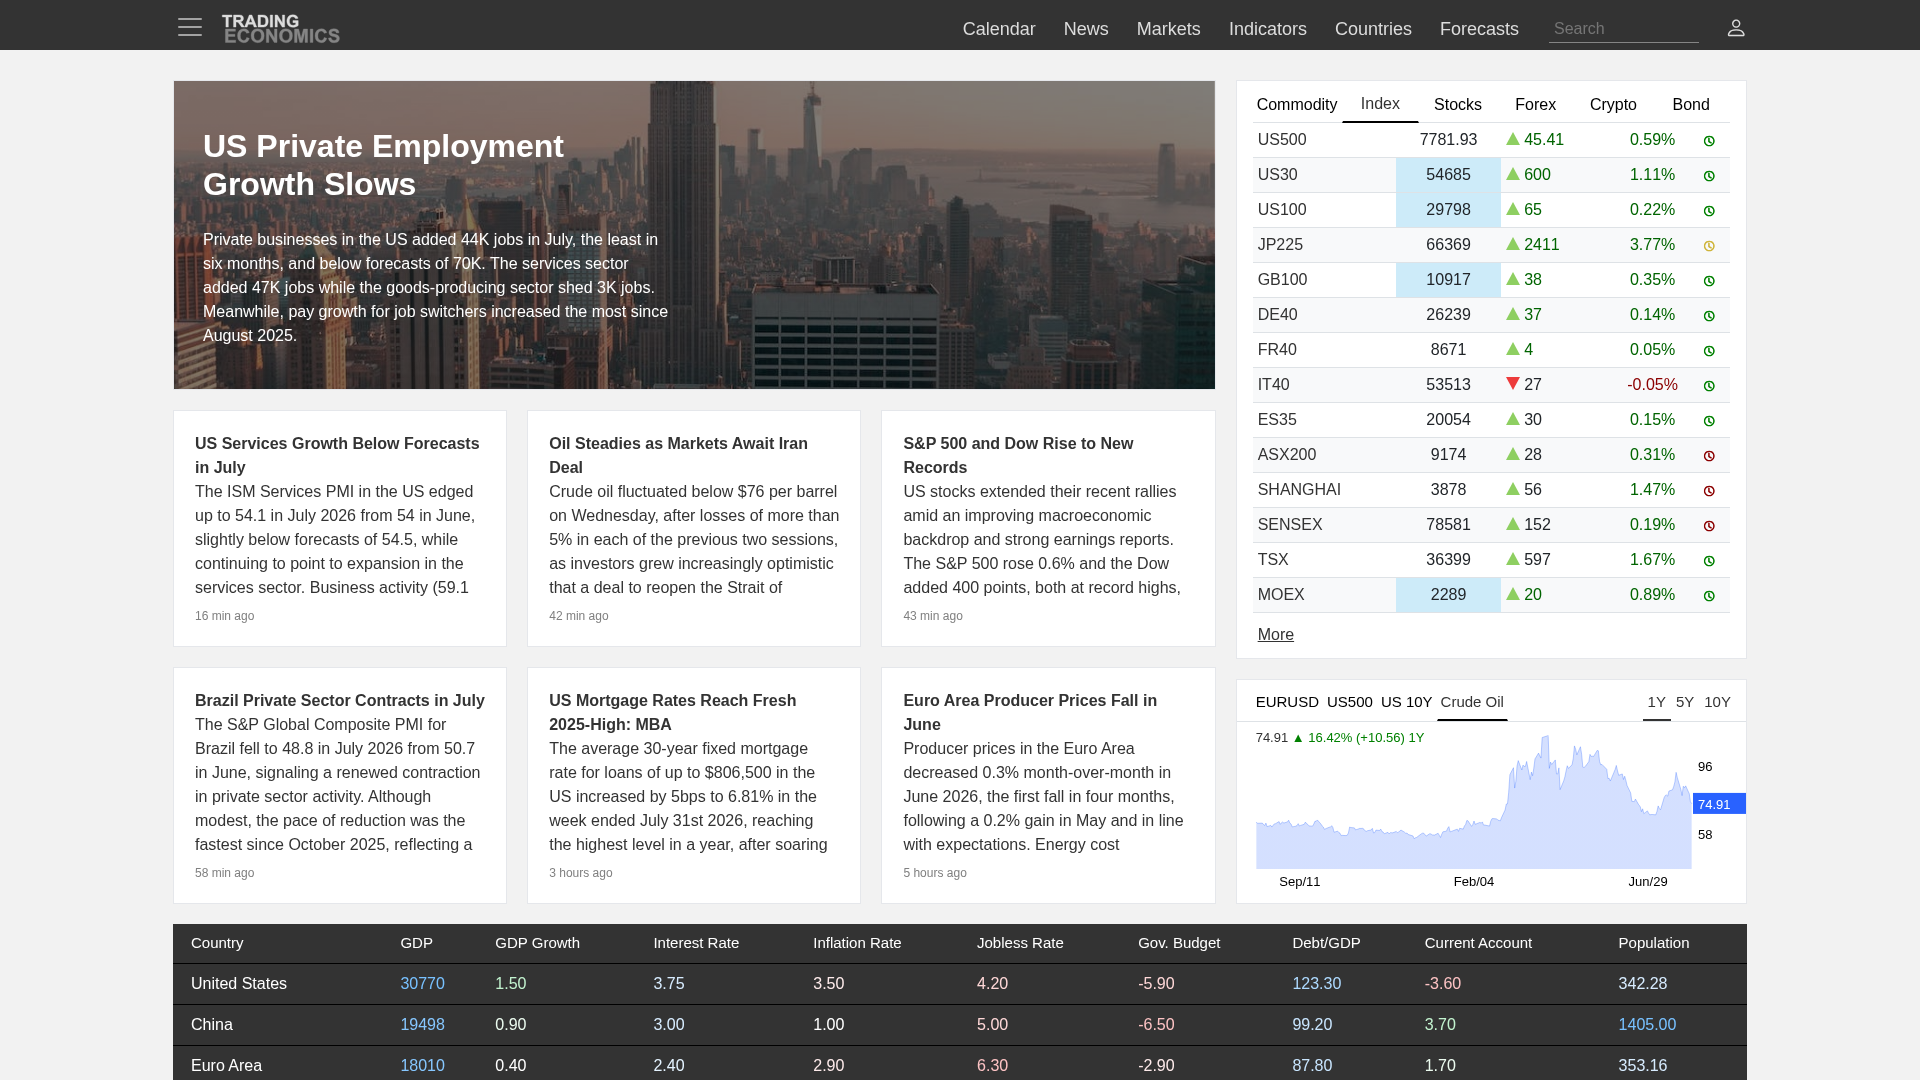
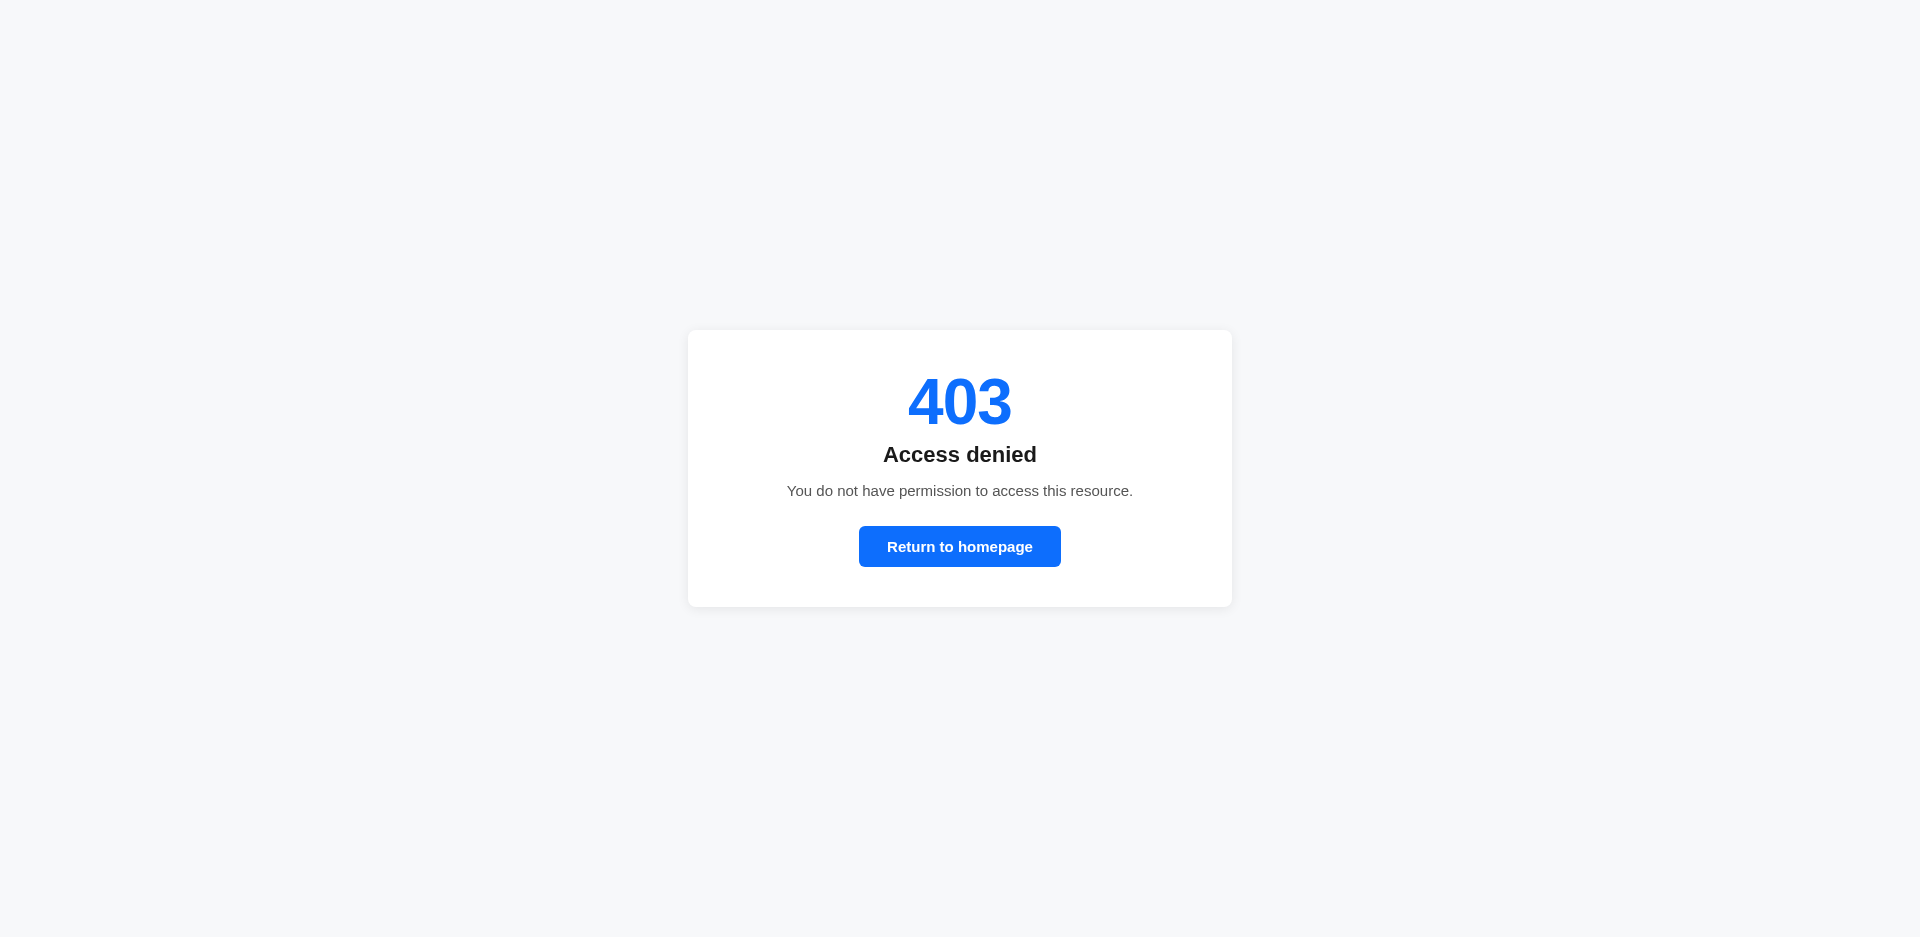
On the bot protection bypass test, Playwright scored 84.2% (16/19; 1 N/A), Puppeteer scored 78.9% (15/19; 1 N/A), Selenium scored 11.1% (2/18; 2 N/A), and Screenshot Scout scored 94.7% (18/19; 1 N/A).
Two of the three libraries got to the real page roughly four times out of five. The Zorilla stealth plugin works for Playwright and Puppeteer, and for those two it's the strongest argument for staying with a library.
Selenium is the one it doesn't work for, and the reason is worth explaining, because it's visible in a screenshot.
Playwright and Puppeteer both run the full stealth plugin, which hooks into the browser launch itself. Selenium can't use that plugin, so the accepted workaround is to extract its evasions into a single script and inject it with the CDP command Page.addScriptToEvaluateOnNewDocument. That's what I ran. To check whether the injection was doing anything at all, I ran Selenium twice against bot.sannysoft.com, a client-side fingerprint test page: once bare, once with that script injected.
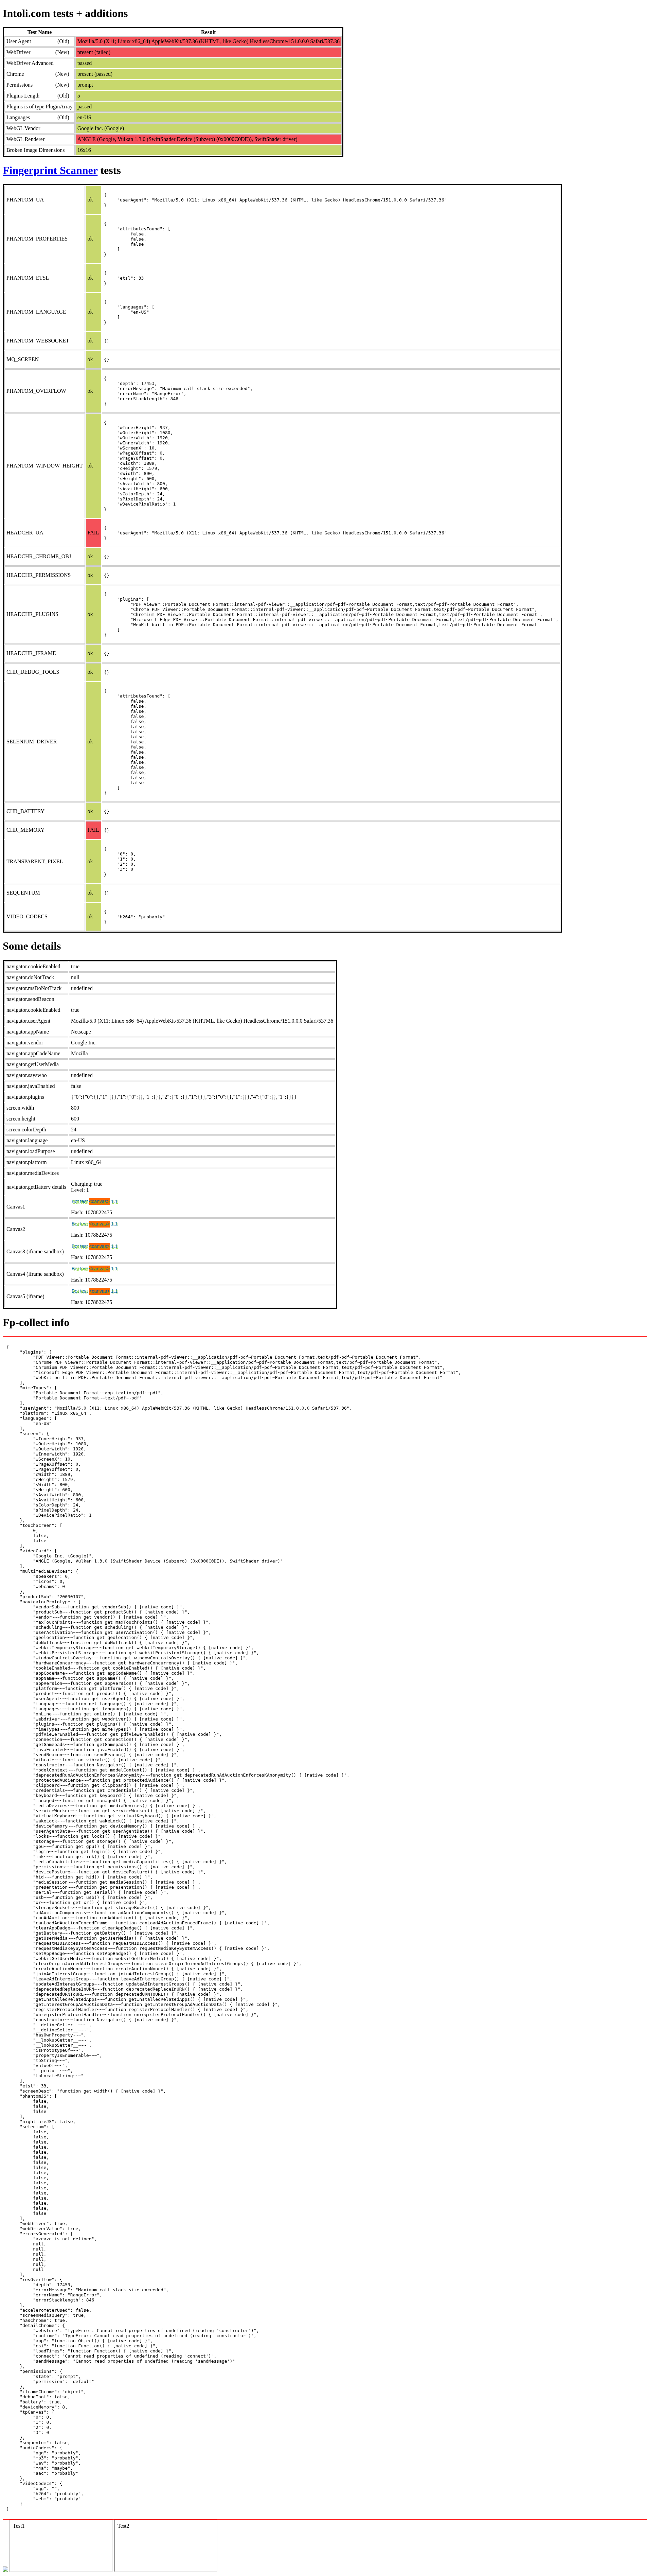
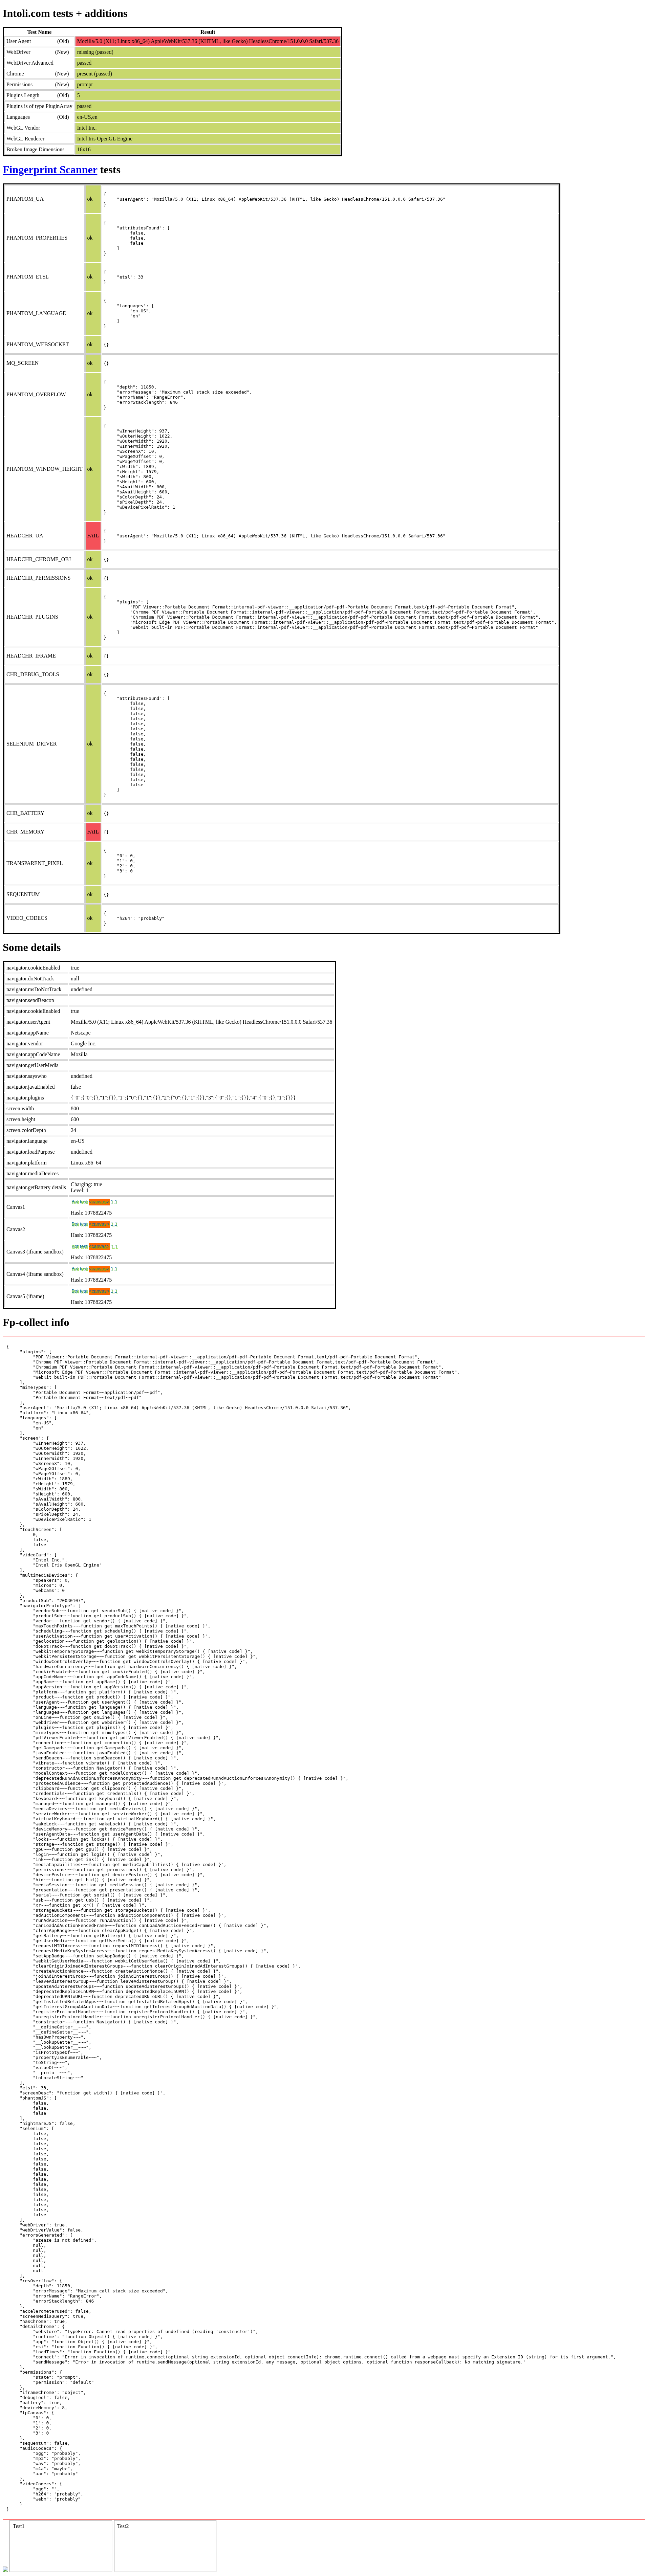
It's doing something. Bare, the page flags navigator.webdriver as present, and the WebGL renderer comes back as SwiftShader, Chrome's software renderer, which no real user's machine reports. With the script injected, both turn green: webdriver is gone and WebGL reports Intel Inc. / Intel Iris OpenGL Engine.
One row stays red in both, though, and it's the one that matters: the User Agent still says HeadlessChrome. The script never touches it. And a page script couldn't fix the whole problem anyway, because the User-Agent header goes out with every request before any of your JavaScript runs. The full stealth plugin that Playwright and Puppeteer run doesn't have that problem: it replaces the user agent through the DevTools Protocol, so the header changes along with what JavaScript reports.
I can't prove that's the single signal every site used to catch it, and I won't pretend otherwise. But announcing yourself as HeadlessChrome in a header is a cheap thing for a site to check, and it's the one difference the fingerprint test still shows.
One caveat that applies to this whole test: we ran from a datacenter IP, which counts against you, and sites revise their protection constantly. Treat these scores as a point-in-time snapshot, not a fixed ranking.
Summary
None of the DIY work is hard. A cookie-banner clicker, a scroll-and-stitch routine, a stealth setup: any competent developer can write them, and in Node.js you barely have to, because the packages already exist and, as the numbers above show, they work.
The cost is upkeep. Those scores are a snapshot of early August 2026, and they don't hold. Sites rewrite their markup and tighten their bot protection, browsers release new versions, filter and evasion lists fall behind, and the numbers get worse unless somebody keeps them current. Note that the stealth plugin behind the 84.2% is itself a fork, created because the original stopped being maintained. Somebody has to do that work. The only question is whether it's you or a vendor.
Should you use Playwright, Puppeteer, Selenium, or Screenshot Scout?
That depends on what you're building. Here's how I'd decide:
- Use Playwright if you want the strongest general-purpose library for Node.js screenshots. It won every performance metric we measured (fastest, lightest on RAM, lowest on CPU), it was the best library on bot protection at 84.2%, the code is tidy, and it's actively maintained. On the downside, its built-in full-page capture misses lazy-loaded images, and roughly one cookie banner in eight survives, so fixing either takes extra code.
- Use Puppeteer if you're already on Puppeteer, or you want the plugin ecosystem built around it. That ecosystem is the reason to pick it: puppeteer-extra's stealth plugin, which we ran through the Zorilla fork, is the most widely used off-the-shelf answer to bot protection anywhere. Note though that it was the slowest and the heaviest on CPU of the three libraries, and it scored below Playwright on bot protection (78.9% against 84.2%).
- Use Selenium if you're already on a Selenium/WebDriver stack, or you need to drive browsers other than Chrome from the same code. Its BiDi full-page capture is native rather than a workaround, though it still missed lazy-loaded images in our tests. The bigger trade-off is bot protection: at 11.1% it's the one library where the off-the-shelf stealth route didn't work. It's also the heaviest on RAM.
- Use Screenshot Scout if you need production-grade quality and scale. It beat every library on cookie banners, full-page capture, and bot protection, the rendering runs on Screenshot Scout's machines instead of yours, and there's nothing for you to maintain. On the cons side, it's about twice as slow per screenshot, it may cost money depending on your volume, and 55% on full-page capture might not fit every use-case.
Keep in mind that the tool isn't the only thing you're choosing. The bigger decision is running a headless browser yourself versus calling a screenshot API.
Run one yourself and you need the RAM and CPU to support it, plus somebody to keep the library and its off-the-shelf packages current, since their reliability degrades if you don't. Node.js keeps that cost as low as it gets, because the packages you need are all there and they work.
Go with a screenshot API and none of that is your problem. Paying for it is.
Frequently asked questions
Common questions about taking website screenshots in Node.js.
What's the best way to take a website screenshot in Node.js?
Playwright, in most cases. It's free, actively maintained, and it won every performance metric in our benchmarks. If what you need is scale, full-page capture that includes lazy-loaded content, or the highest bot protection bypass rate, use a screenshot API like Screenshot Scout instead.
Should I use Playwright or Puppeteer?
Playwright, unless you have a specific reason not to. It was faster (1.4s against 1.6s), lighter on RAM (656MB against 1063MB), lighter on CPU (1.78 against 2.24 CPU-seconds), and better at getting past bot protection (84.2% against 78.9%). Pick Puppeteer if you're already invested in it or you need something from the puppeteer-extra plugin ecosystem that has no Playwright equivalent.
How do I take a full-page screenshot in Node.js?
Playwright and Puppeteer both take fullPage: true, and Selenium goes through WebDriver BiDi with Origin.DOCUMENT. All three miss lazy-loaded images, though, because none of them scrolls the page first. There are three fixes: scroll the page top to bottom yourself before capturing, use measure-and-resize, or use scroll-and-stitch. With a screenshot API you don't need any of them, since full-page capture is a single option and the lazy-loaded content comes with it.
Why is my Node.js screenshot missing images?
Lazy loading, almost always, and the fix depends on which kind of screenshot you took.
In a viewport screenshot the images hadn't finished loading when you captured, so add a short delay before capturing or wait for the element you care about. You can also change what goto() waits for: it defaults to the load event, and both libraries can wait for the network to go quiet instead (networkidle in Playwright, networkidle2 in Puppeteer). Be warned, though: Playwright's own docs discourage networkidle, because a single long-polling request or analytics beacon can stop the page from ever going idle.
In a full-page screenshot they never started loading at all, because nothing scrolled them into view. Scroll the page top to bottom first, use measure-and-resize, or use scroll-and-stitch.
If you'd rather not deal with any of it, a screenshot API like Screenshot Scout covers both cases.
How do I avoid bot blocks or CAPTCHAs when screenshotting in Node.js?
Use a stealth plugin, but which library you're on matters.
Playwright scored 84.2% and Puppeteer 78.9% running the maintained Zorilla fork of puppeteer-extra's stealth plugin. Selenium scored 11.1%, because it can't load that plugin and has to inject the evasions as a page script instead, which leaves HeadlessChrome in the user agent.
A commercial unlocker like Bright Data's Web Unlocker helps more than stealth alone, and residential proxies can too (both are covered in our guide to preventing CAPTCHAs). Nothing is guaranteed, though, and these numbers move with datacenter IPs and site changes.
Can I take a website screenshot in Node.js without a headless browser?
No. Modern HTML, CSS, and JavaScript only render inside a browser engine, so either you drive one (Playwright, Puppeteer, Selenium) or you call an API that drives one for you. A browser runs either way. The question is only whose machine it runs on.
Can Node.js take a screenshot of the screen, not a webpage?
Yes, but that's a different job. Node has nothing built in for it, so you'd need a package like screenshot-desktop or node-screenshots, and neither one involves a browser. This guide is about capturing webpages.